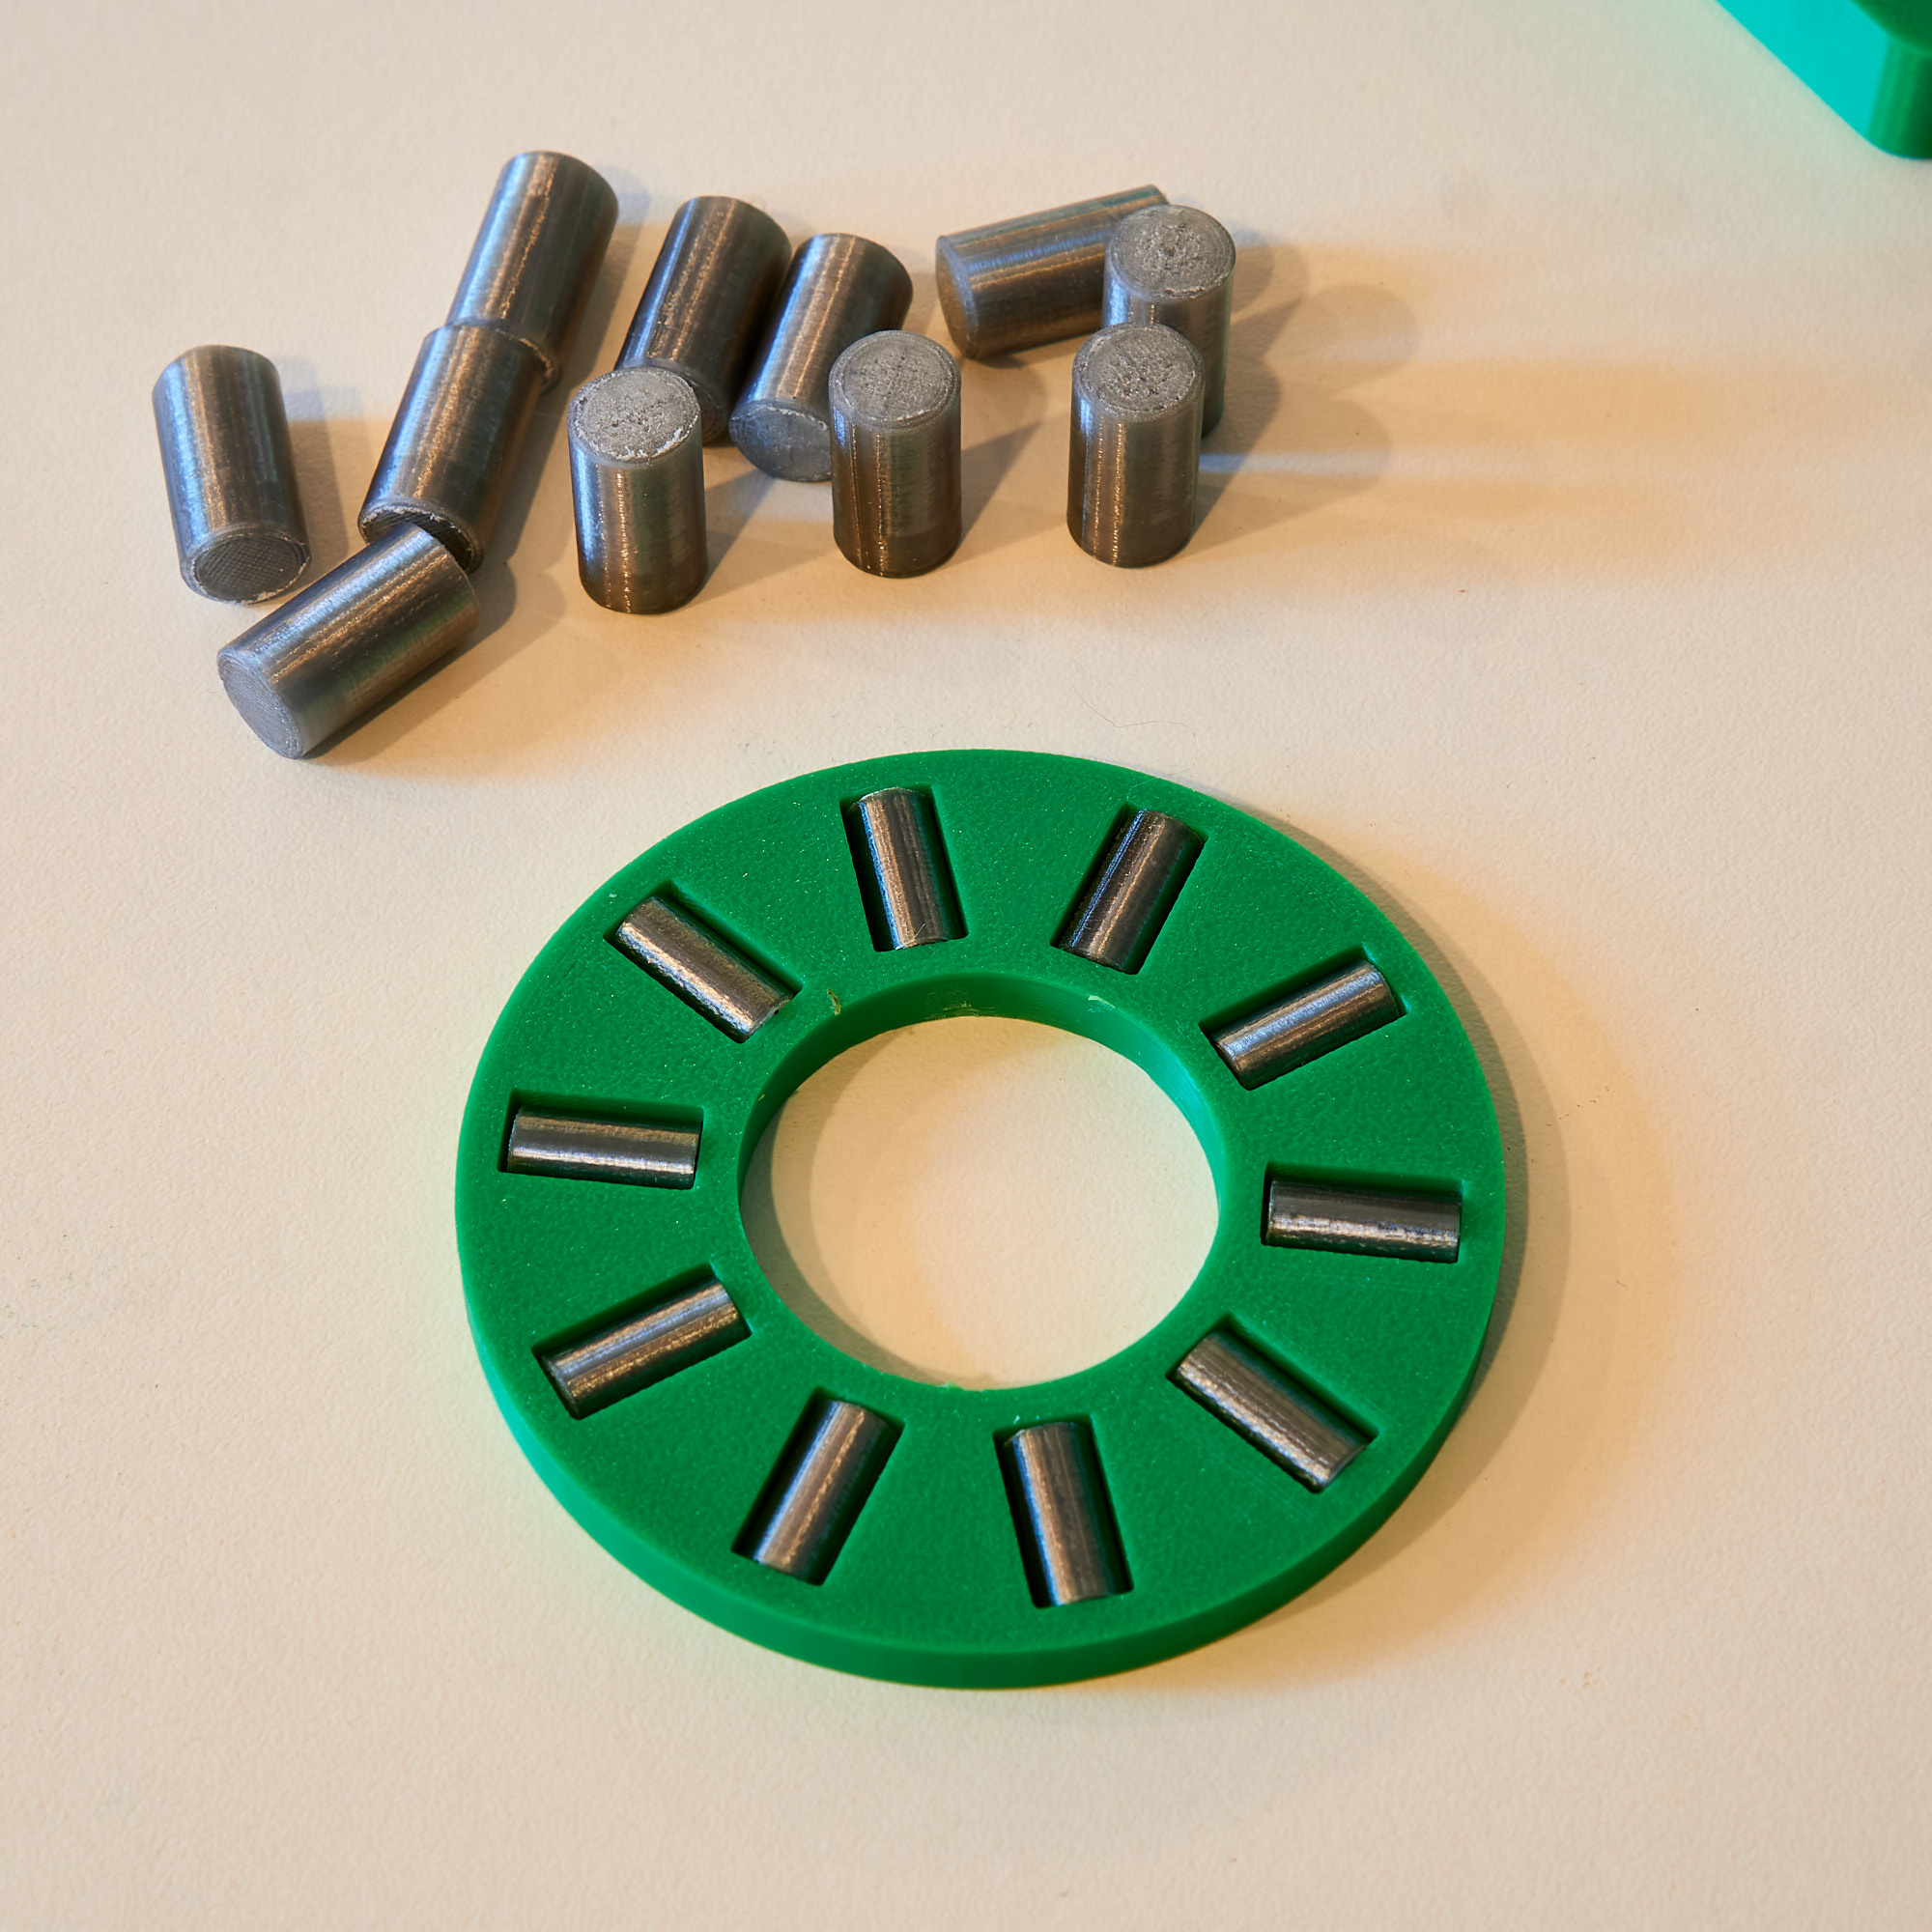
Worked, but eventually failed because while it was capable as a radial bearing to keep the shaft straight, it couldn't withstand the axial load from the lower wheel tending to be pulled forward from the blade tension.
So the fix is to redesign the bearing so that it also has a thrust bearing as well, and that's what you see here.
I also change the rollers to print from polycarbonate, which is much harder than ABS. I'll be running a test of the bearing on the band saw later today.
In other news, I changed my home reno channel to cooking. Yes, cooking - you heard me right :)
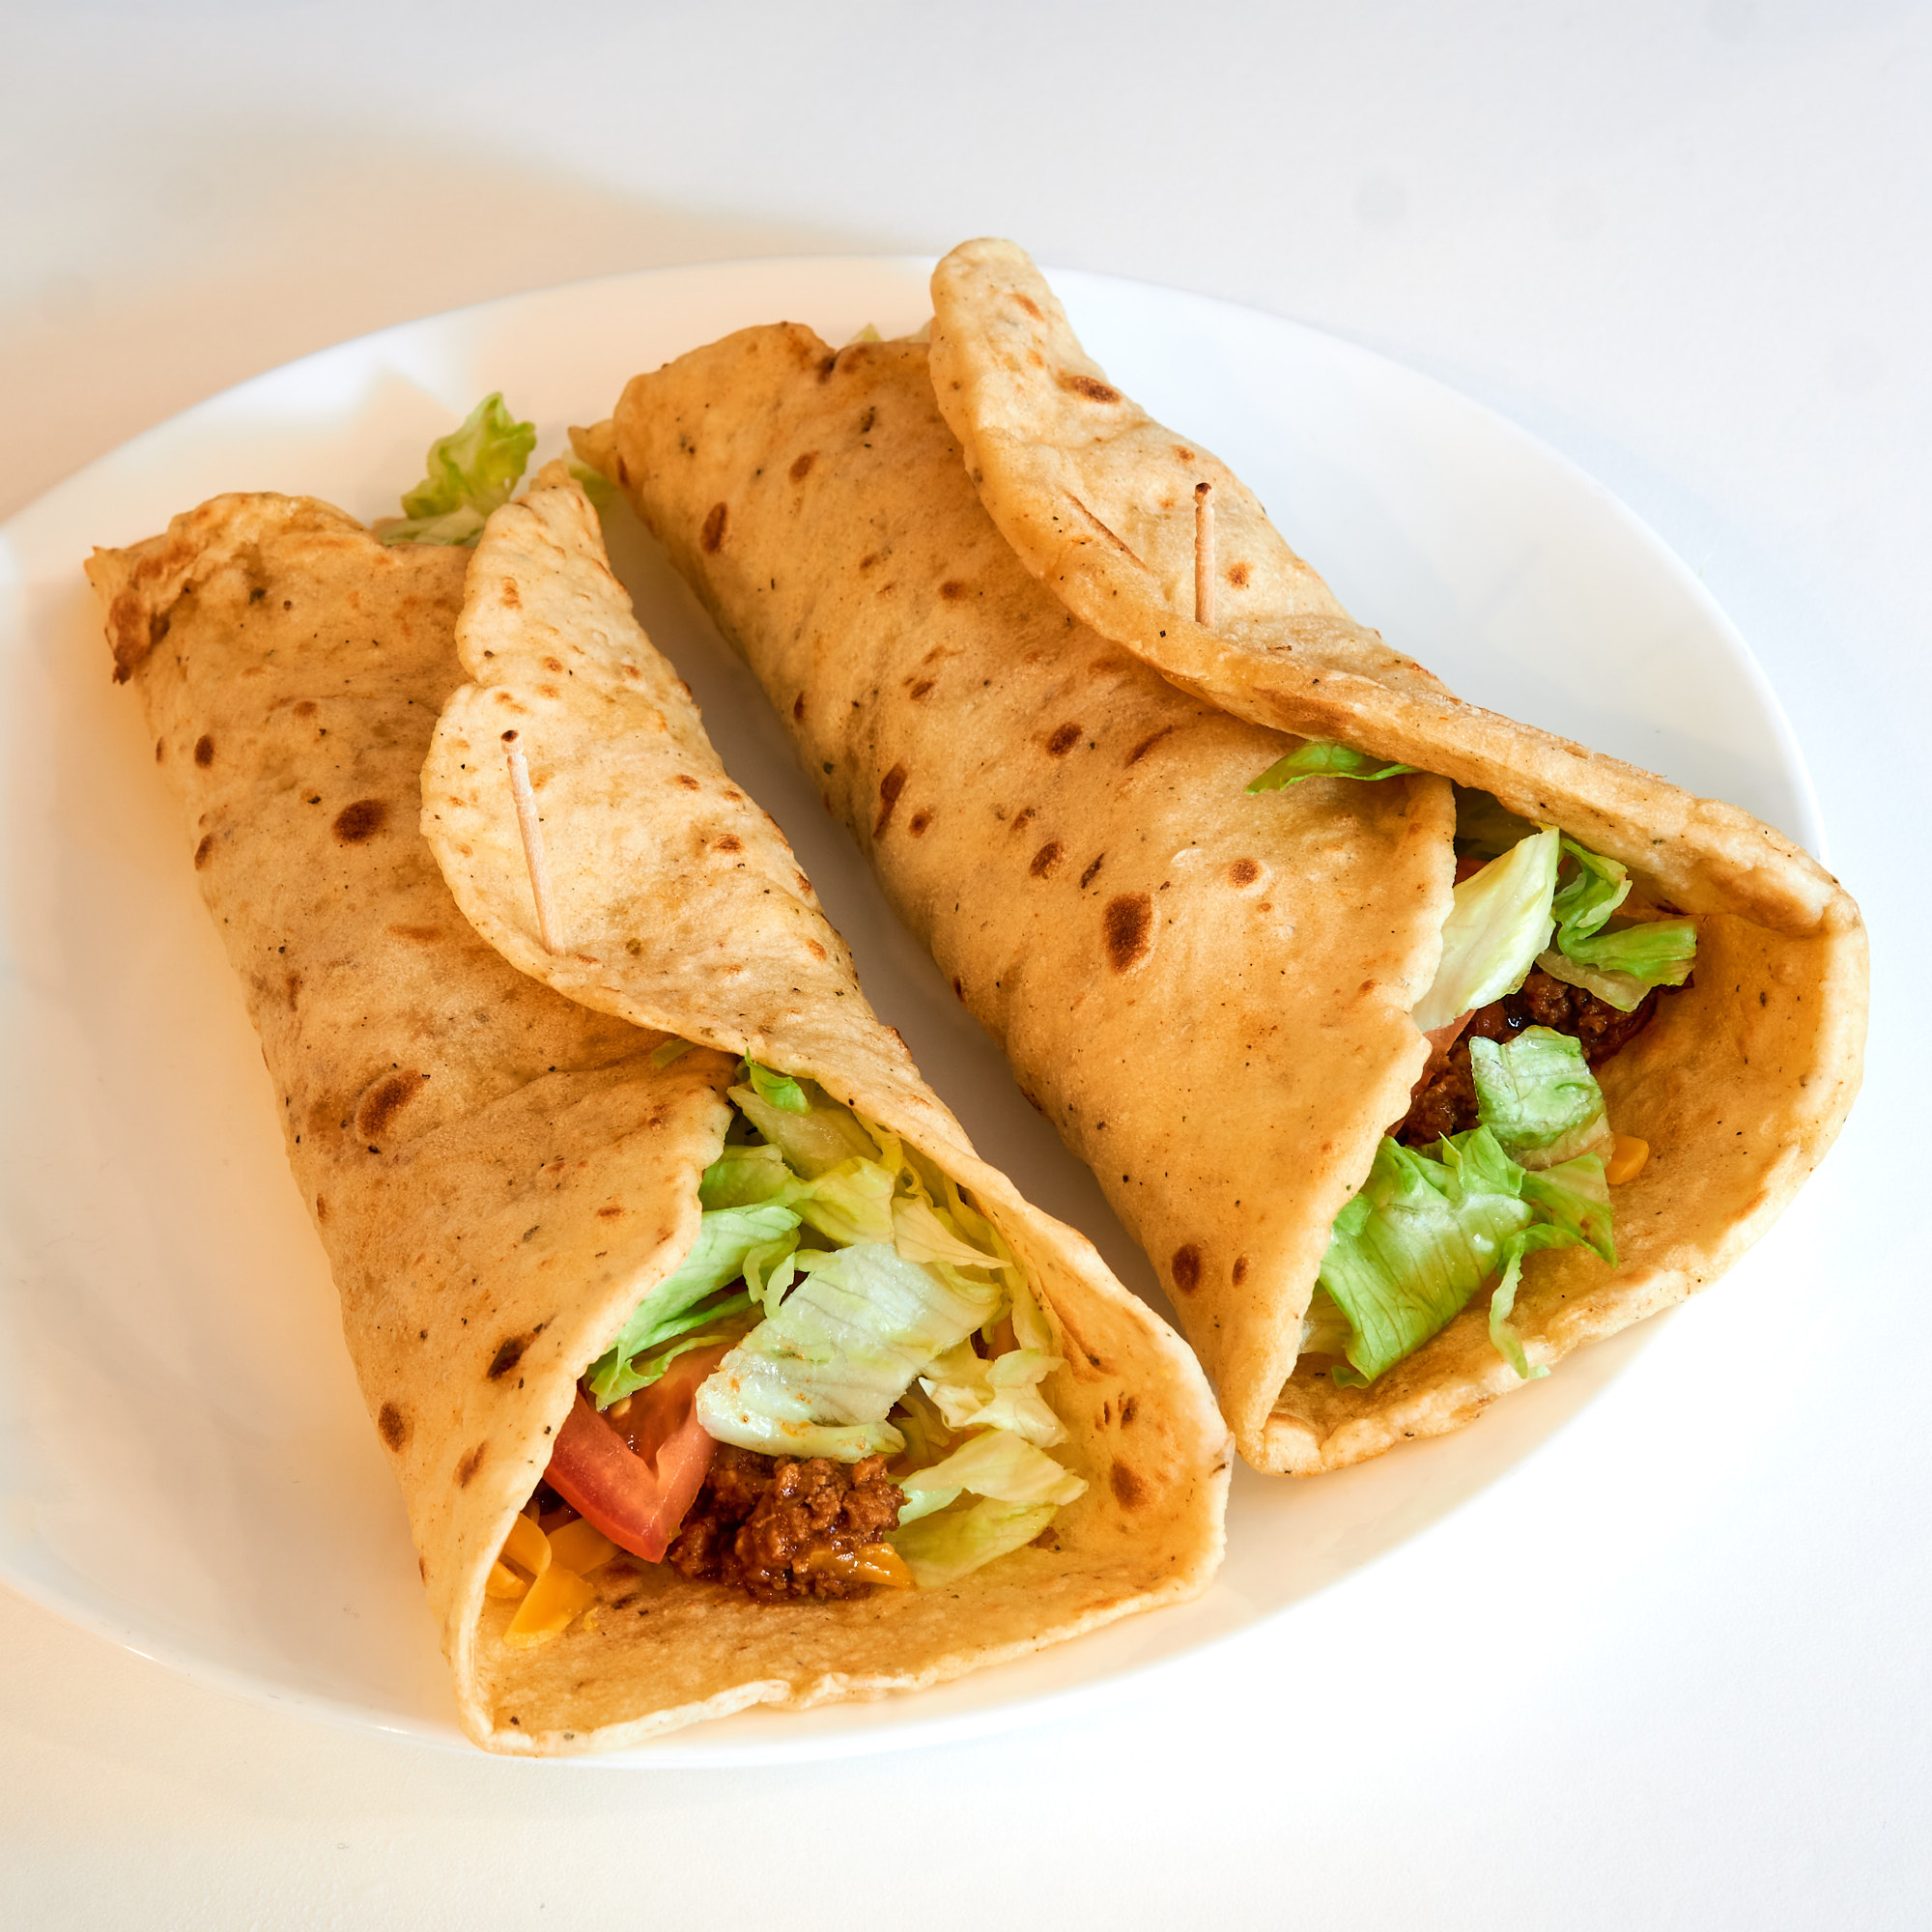
But it's cooking with a twist, in that I'll be making some gadget to use in the kitchen. The first video is up now (you may have seen it) and it's on making an interesting tortilla press and then making the tortillas using a recipe I developed.
Why change the channel? Believe it or not, it's been 5 years since I last uploaded a new video to that channel. Time flies, right? The videos on there still get views, but they are tapering off to the point where the channel will be demonetized unless I add new content. And since it actually makes more sense to put new content of the home improvement type on my main channel, I had nothing to lose.
It would have been better to start a new channel rather than trying to convert an existing audience to a new topic, but this is easier. I'm in it for the fun now, mostly, so not a big deal if the videos underperform.

Cleaner air the cheap way.
I'd rate this more effective than the box fan variety, and it's also more compact.
Another way to cut the folding miter is to use a dado blade tilted to 45 degrees. That's what I was going to do in the first place, before I noticed the V-groove bit. The V-groove bit takes longer to make the cuts, though, and router bits get dull a lot faster than blades.
While it takes some time to cut the folding miters, it takes no time at all to assemble - just fold and tape the miters. This method would work just as well for larger drawers made from thicker plywood, but you'd want to use that dado blade instead of the router bit to speed things up.
Very happy with how this works. I've got three sets of knives for my planer (cost over $150) and two sets of knives for my jointer that I sharpened. Saving money when you do it yourself is the same as making money, in my book. I figure I can get at least one more sharpening on the planer knives before they won't work anymore, since they are disposable to begin with and indexed to the cutter head. The jointer knives were made to be sharpened, though, and those two sets will last out the rest of my life.
The grinding wheel is from an 8" bench grinder I have and is a medium grit. Works great for rapidly grinding that primary bevel, then it just takes a few more minutes on the oil stone to take the edge the rest of the way.
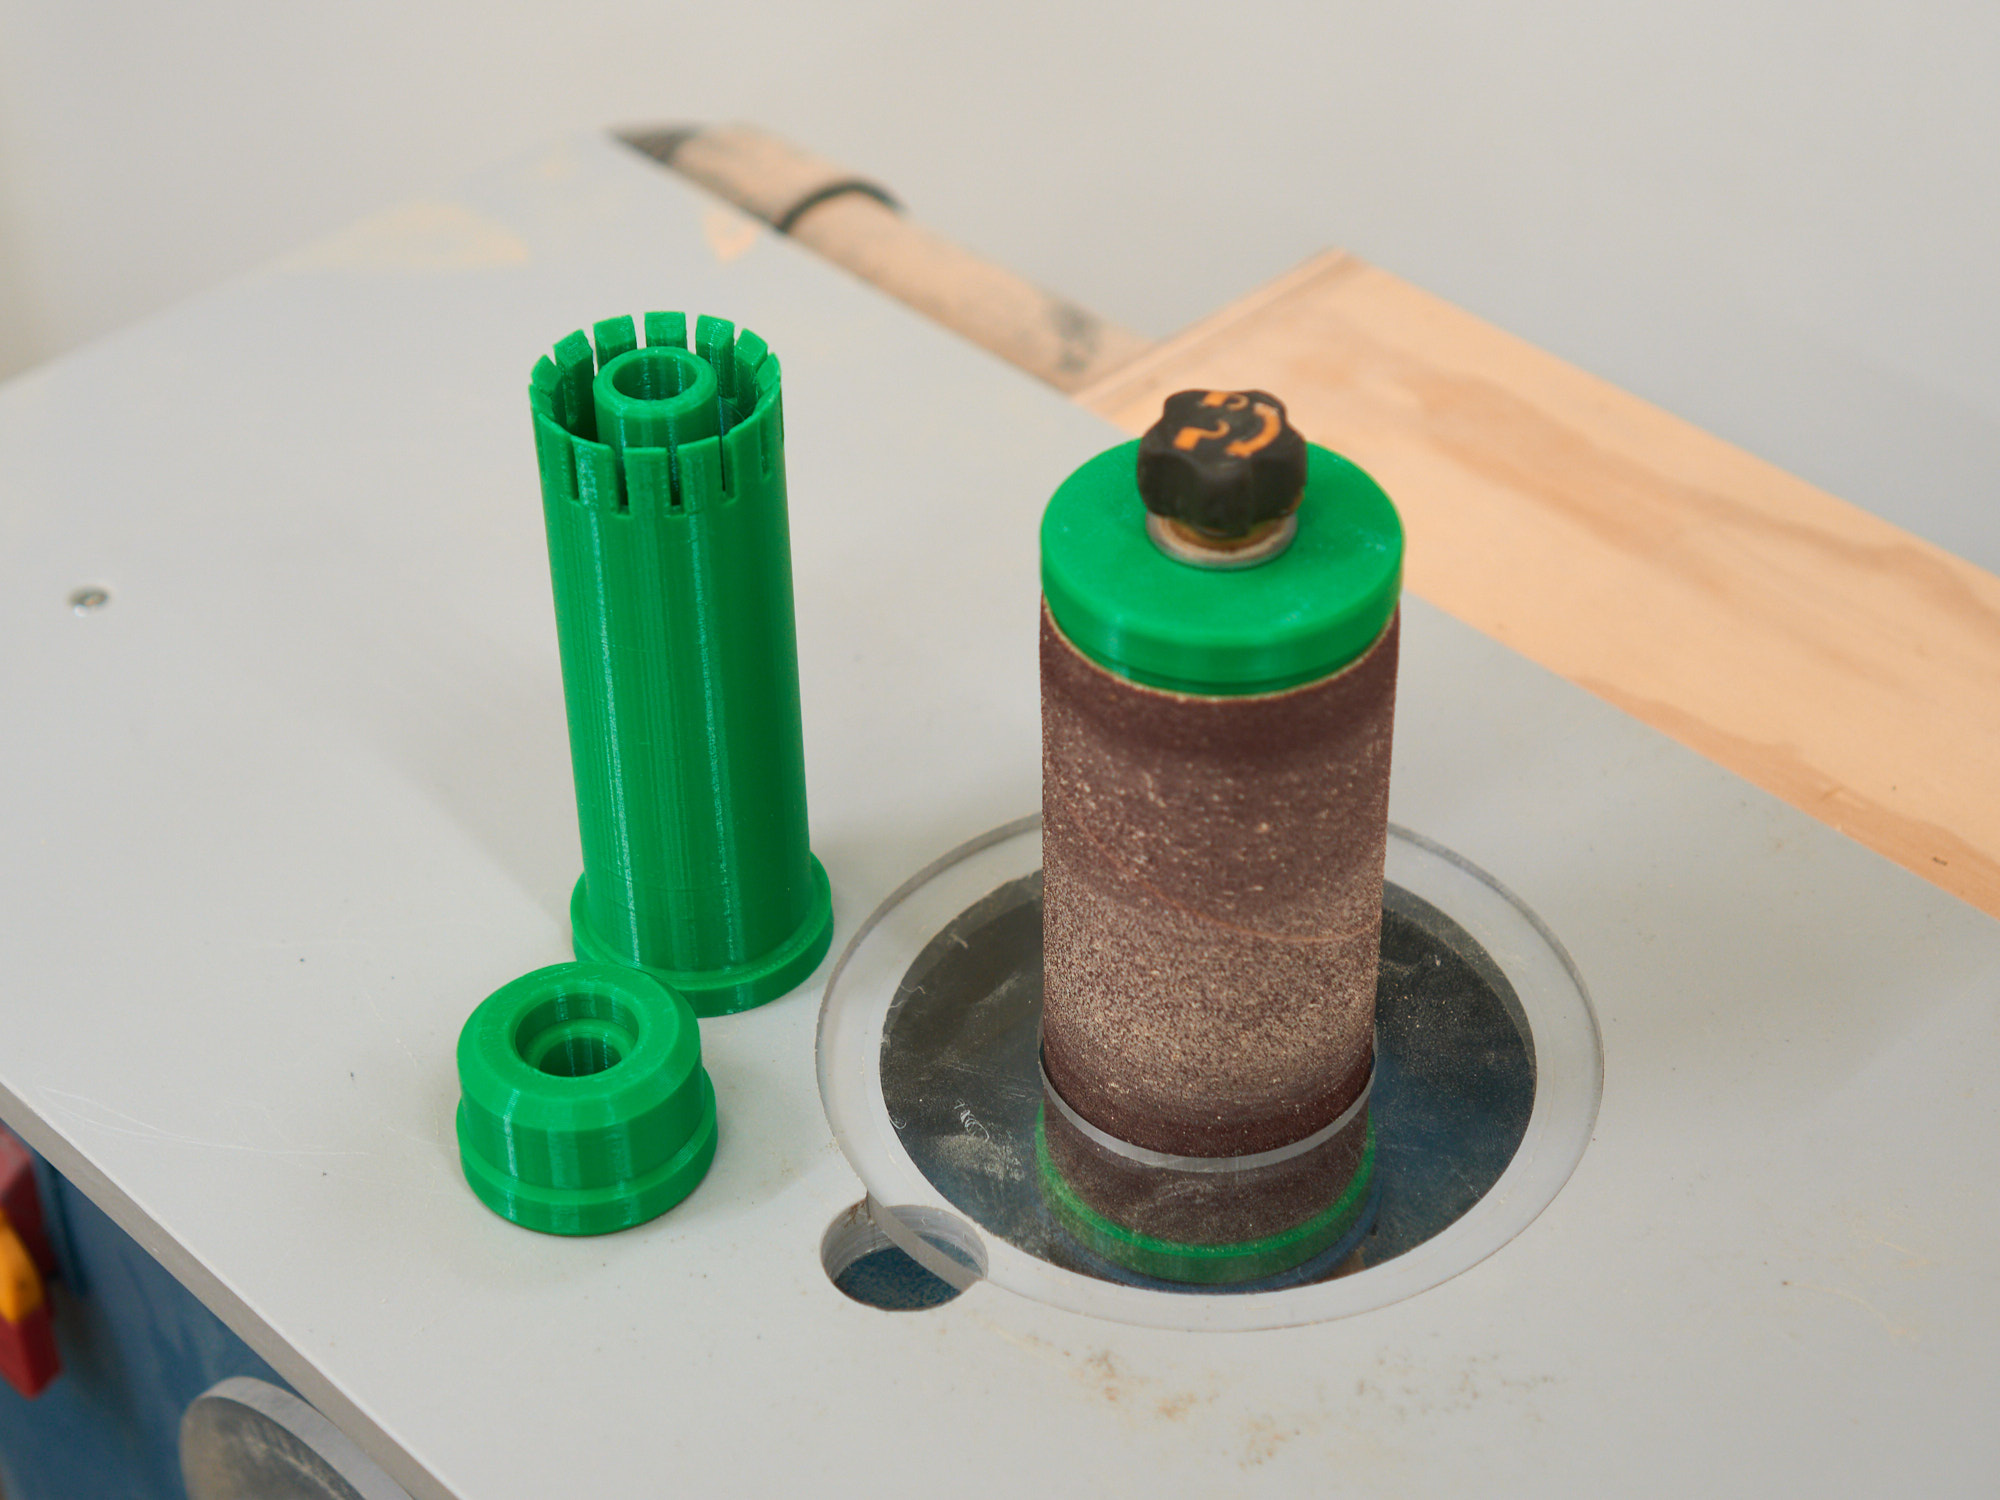
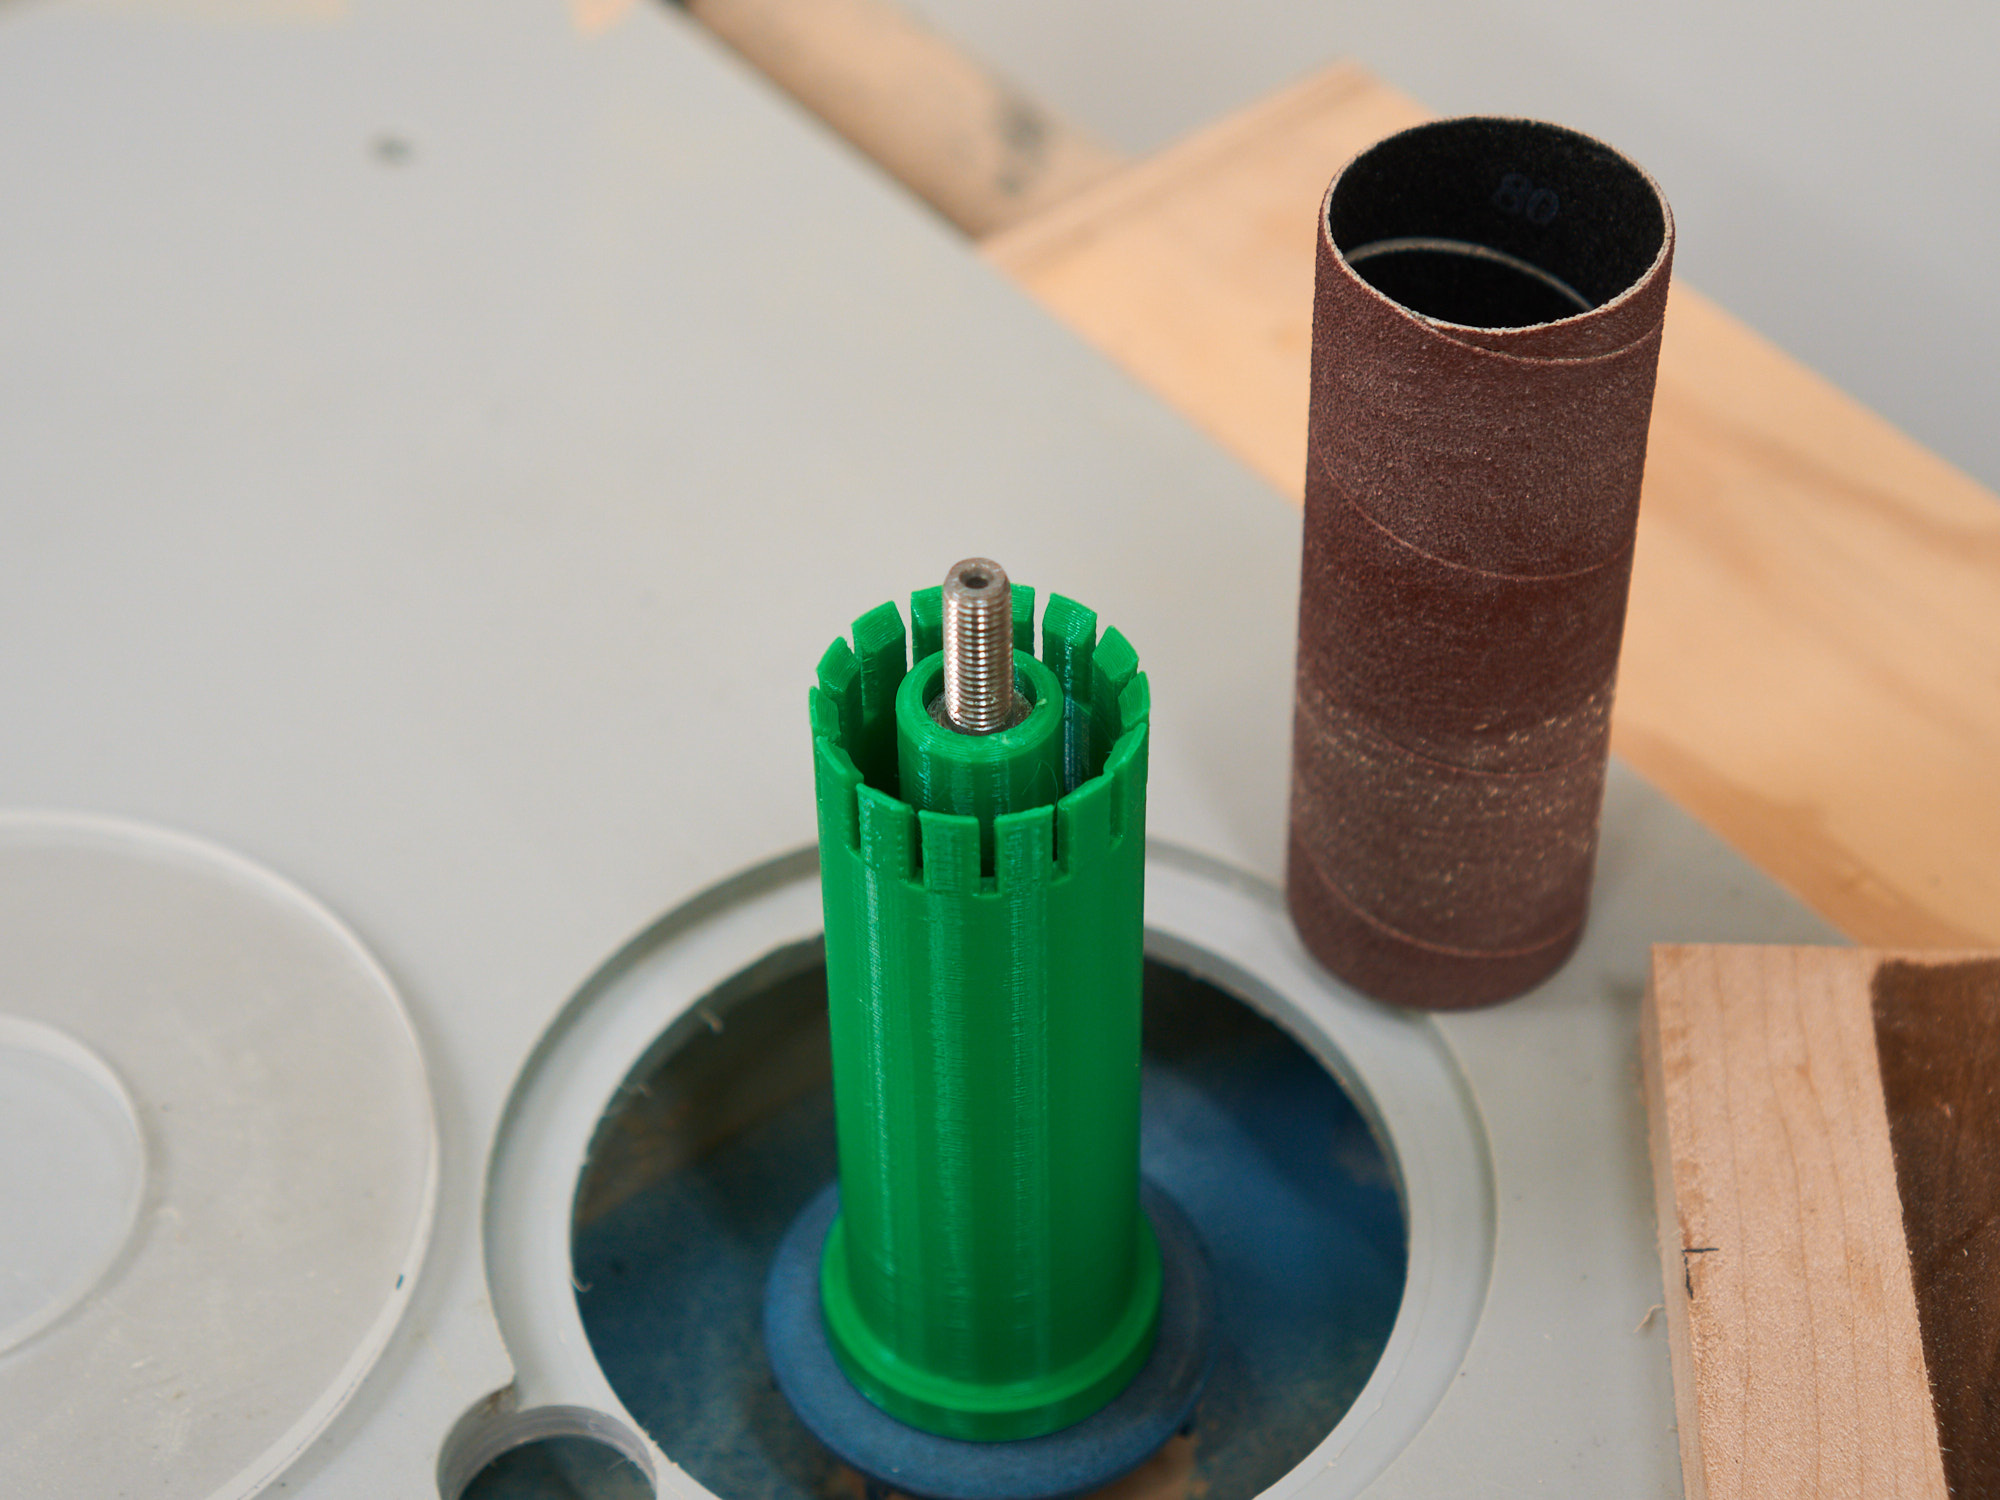
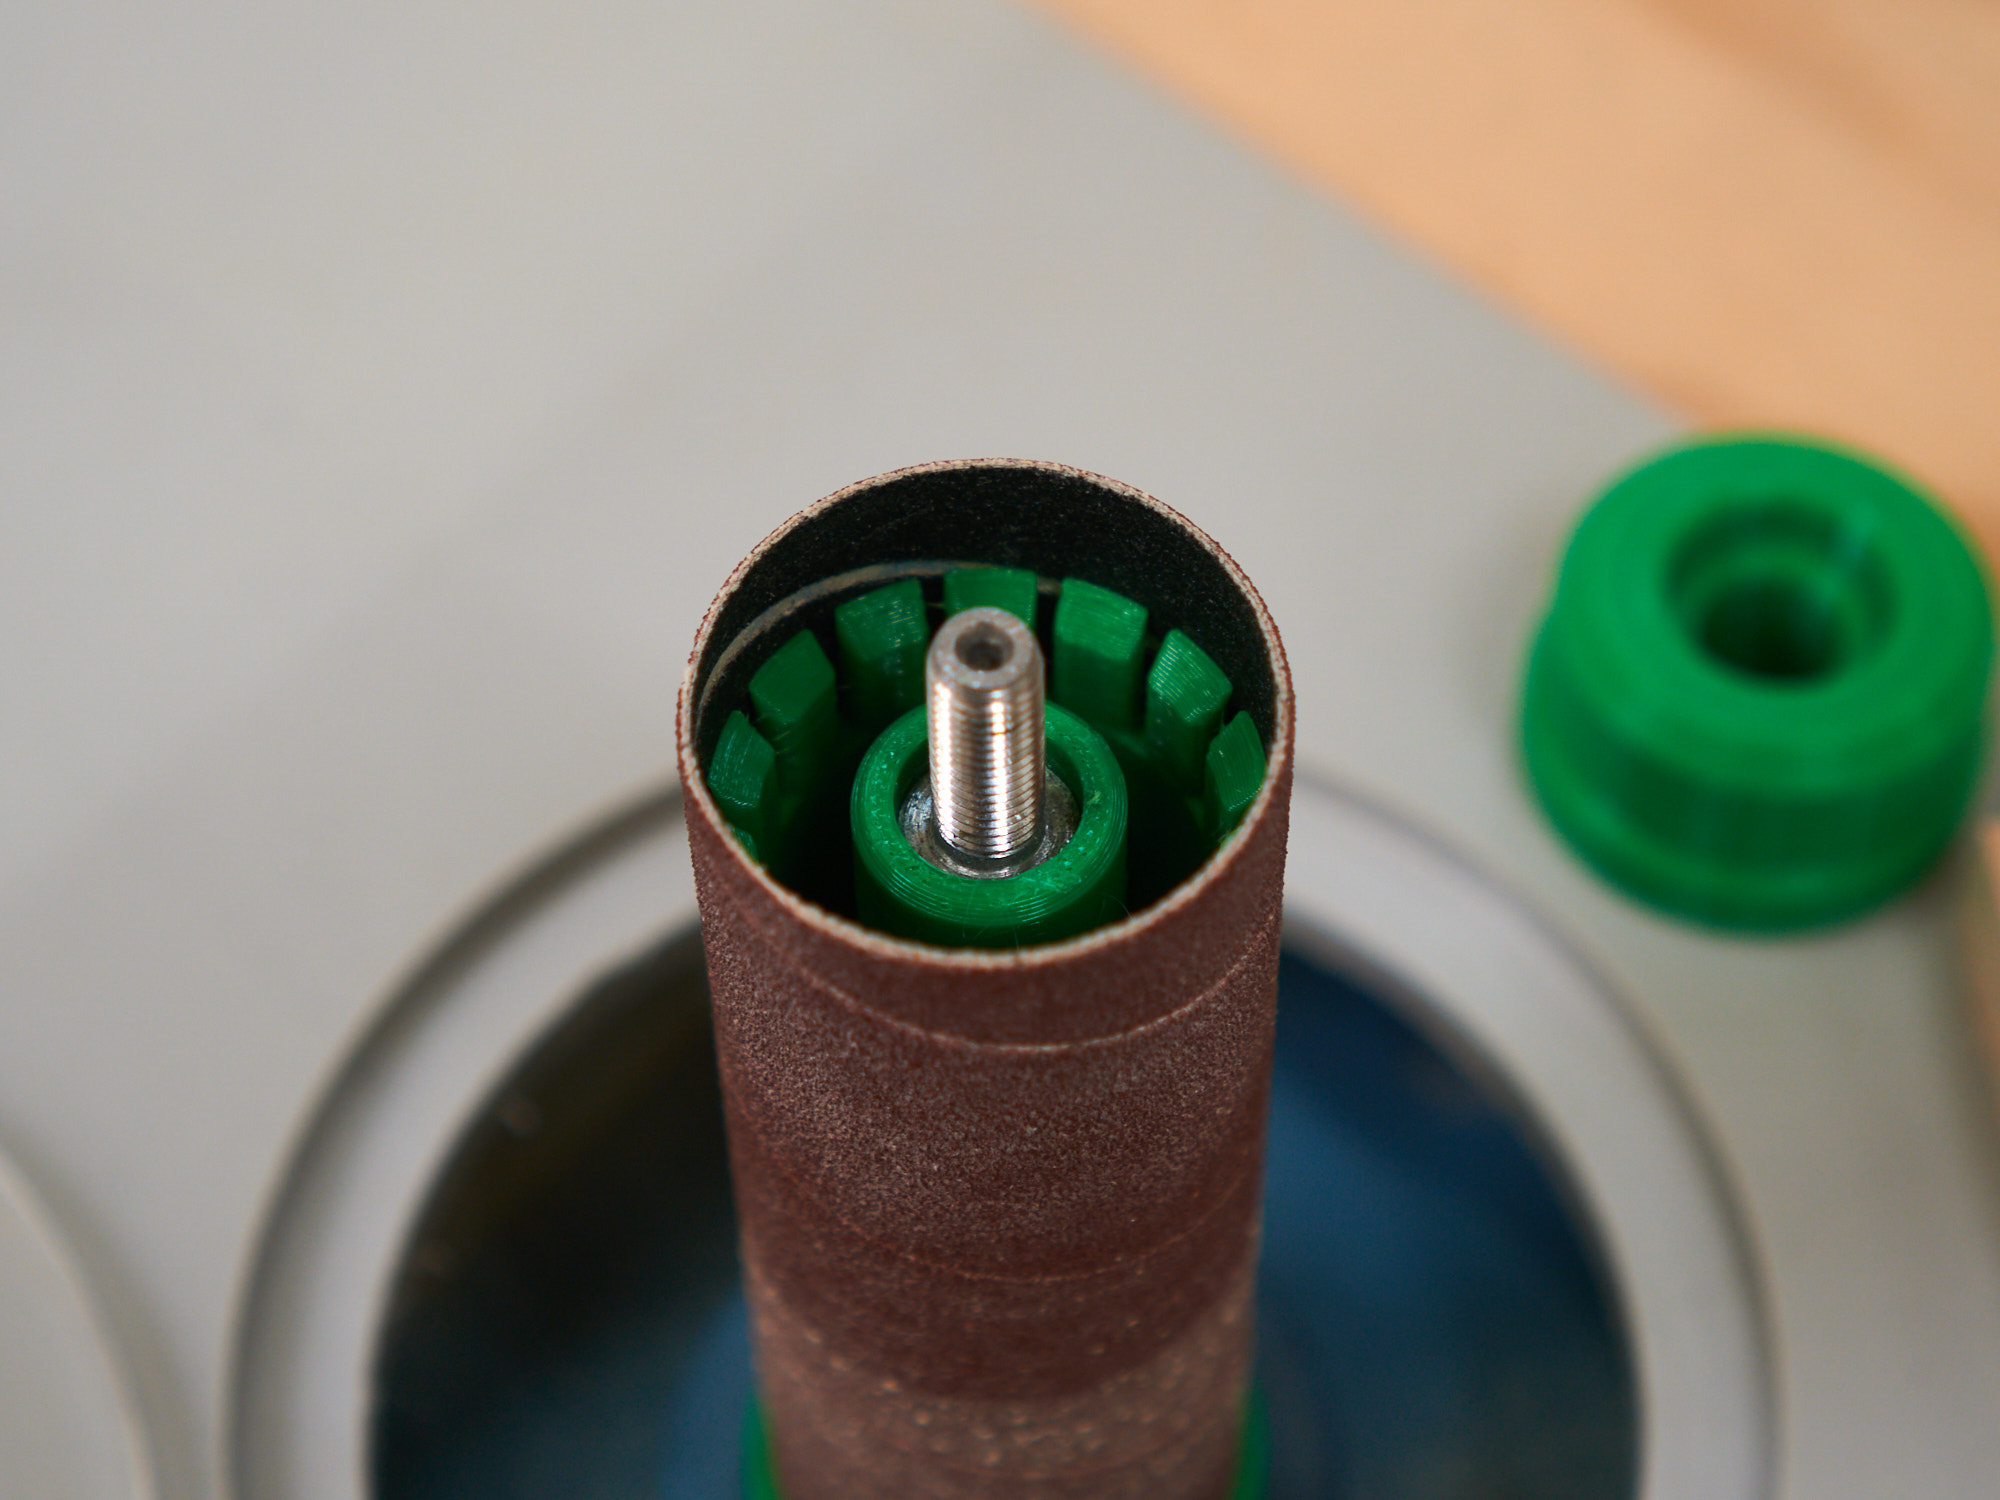
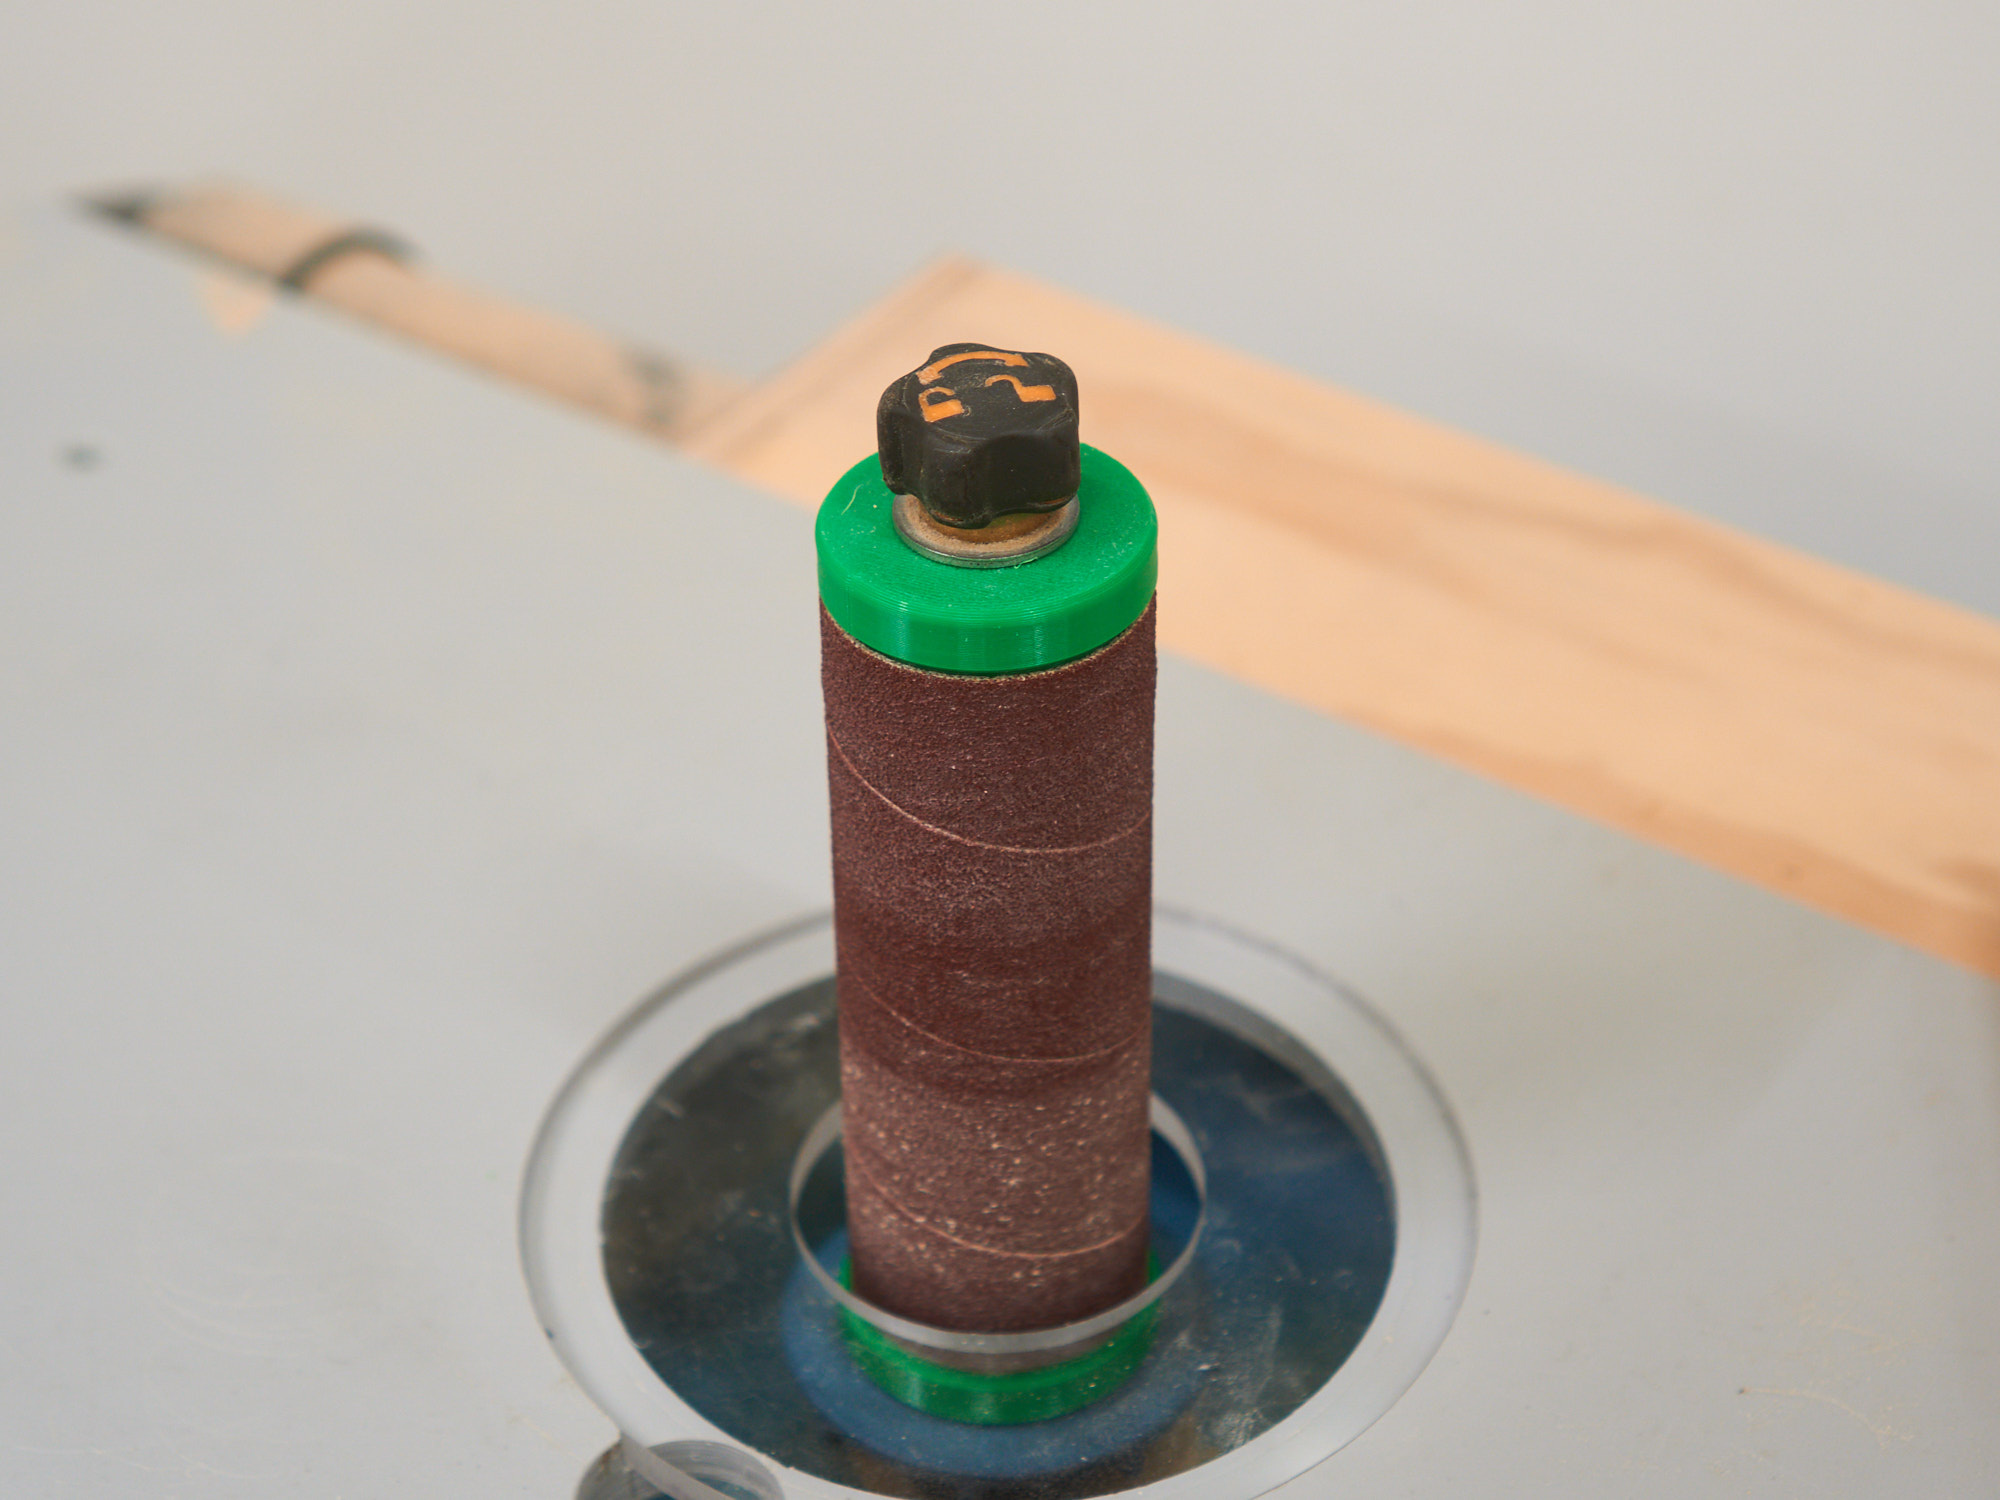
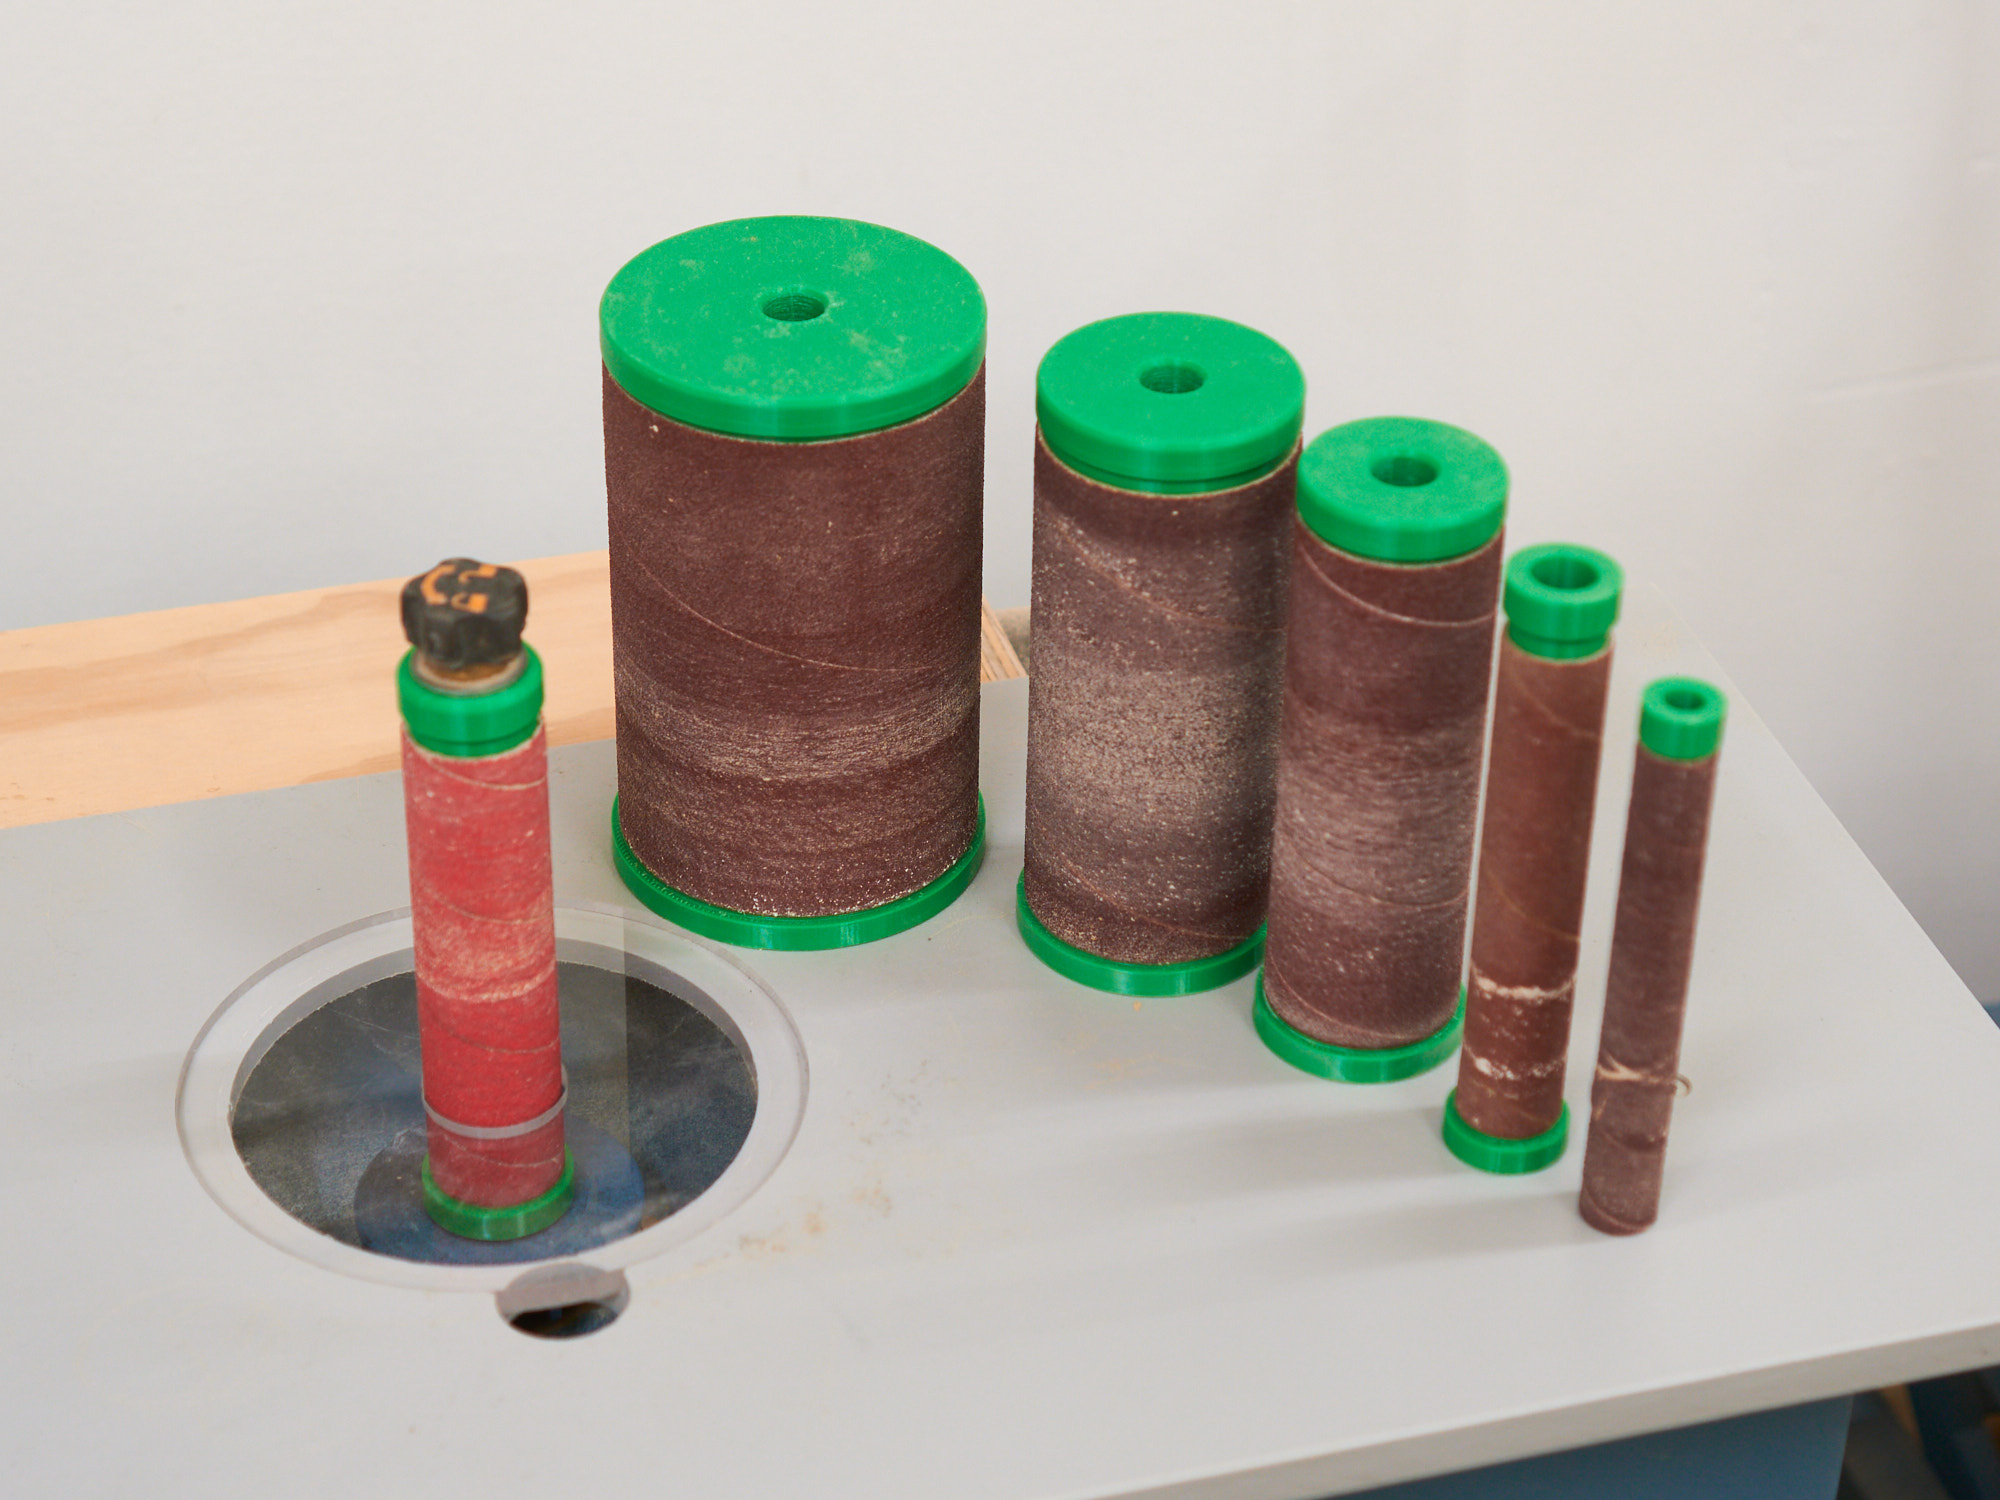
If you've been following me for a while, you may remember the trouble I had with my Ridgid spindle sander - the rubber sanding drums shrunk and wouldn't grip the sleeves tightly enough.
So I made new drums a few years ago from plywood and rubber disks cut from gym flooring and they worked well enough. They held the sleeves firmly and ran true, but the sleeves tended to ride up the drums when sanding aggressively.
Giving it quite a lot of thought since then, off and on, I came up with a way to 3D print them and designed the caps for each so that the sleeves can't ride up.
I tested the first one for the 1-1/2" drum and after I saw how perfectly that worked I designed and printed the whole set:
Even though it's made from plastic !
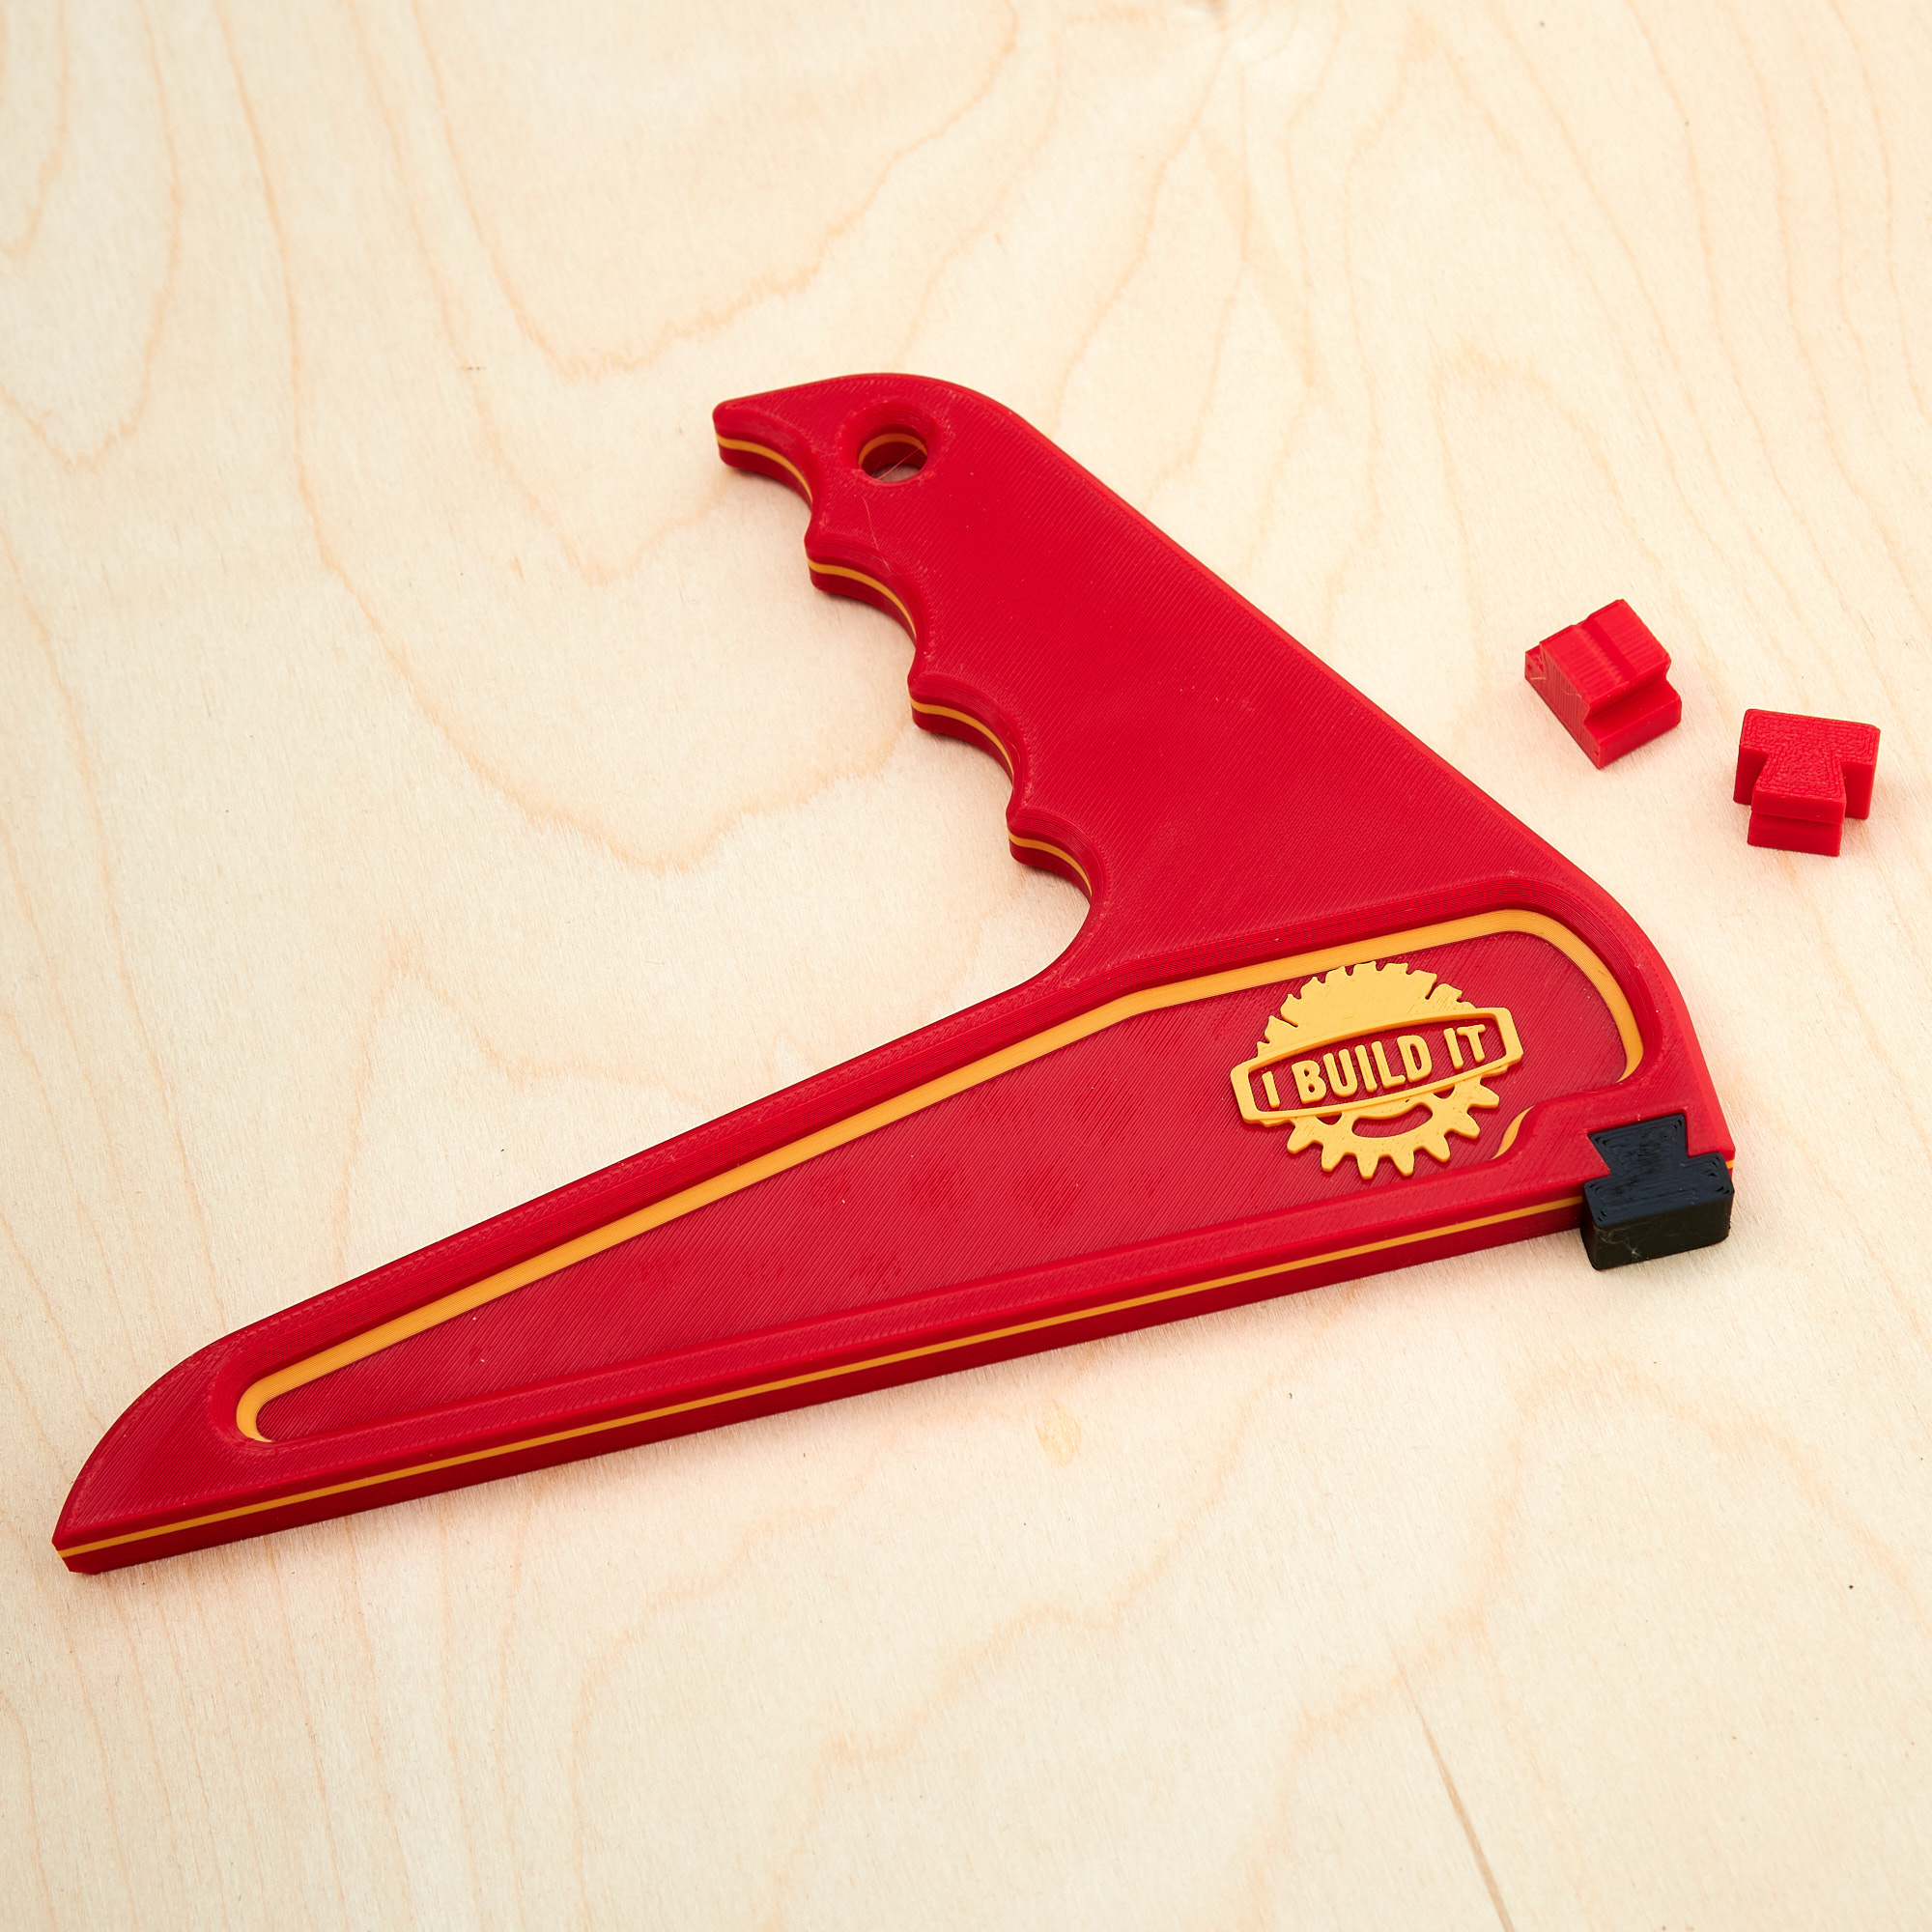
This is nice and has a streamlined form-fitting grip PLUS the stop is replaceable: it just snaps in.
I like the feel of this one so much I think I'll make one from 1/2" Baltic birch ply as well.
Here's the files to print your own:
https://www.dropbox.com/scl/fi/iryrd7i7l7sp69sxya6u2/Push-Stick.zip?rlkey=sem301m3zwtojbhwtx7b4ch3t&st=3ylqszh1&dl=0
Printable template to make one from plywood:
https://www.dropbox.com/scl/fi/z40vqd8vpftlse6jv3aio/Push-Stick-Template2.pdf?rlkey=cilpiwj6kg1ypv1aclzr9tz7d&st=i5q50mp0&dl=0
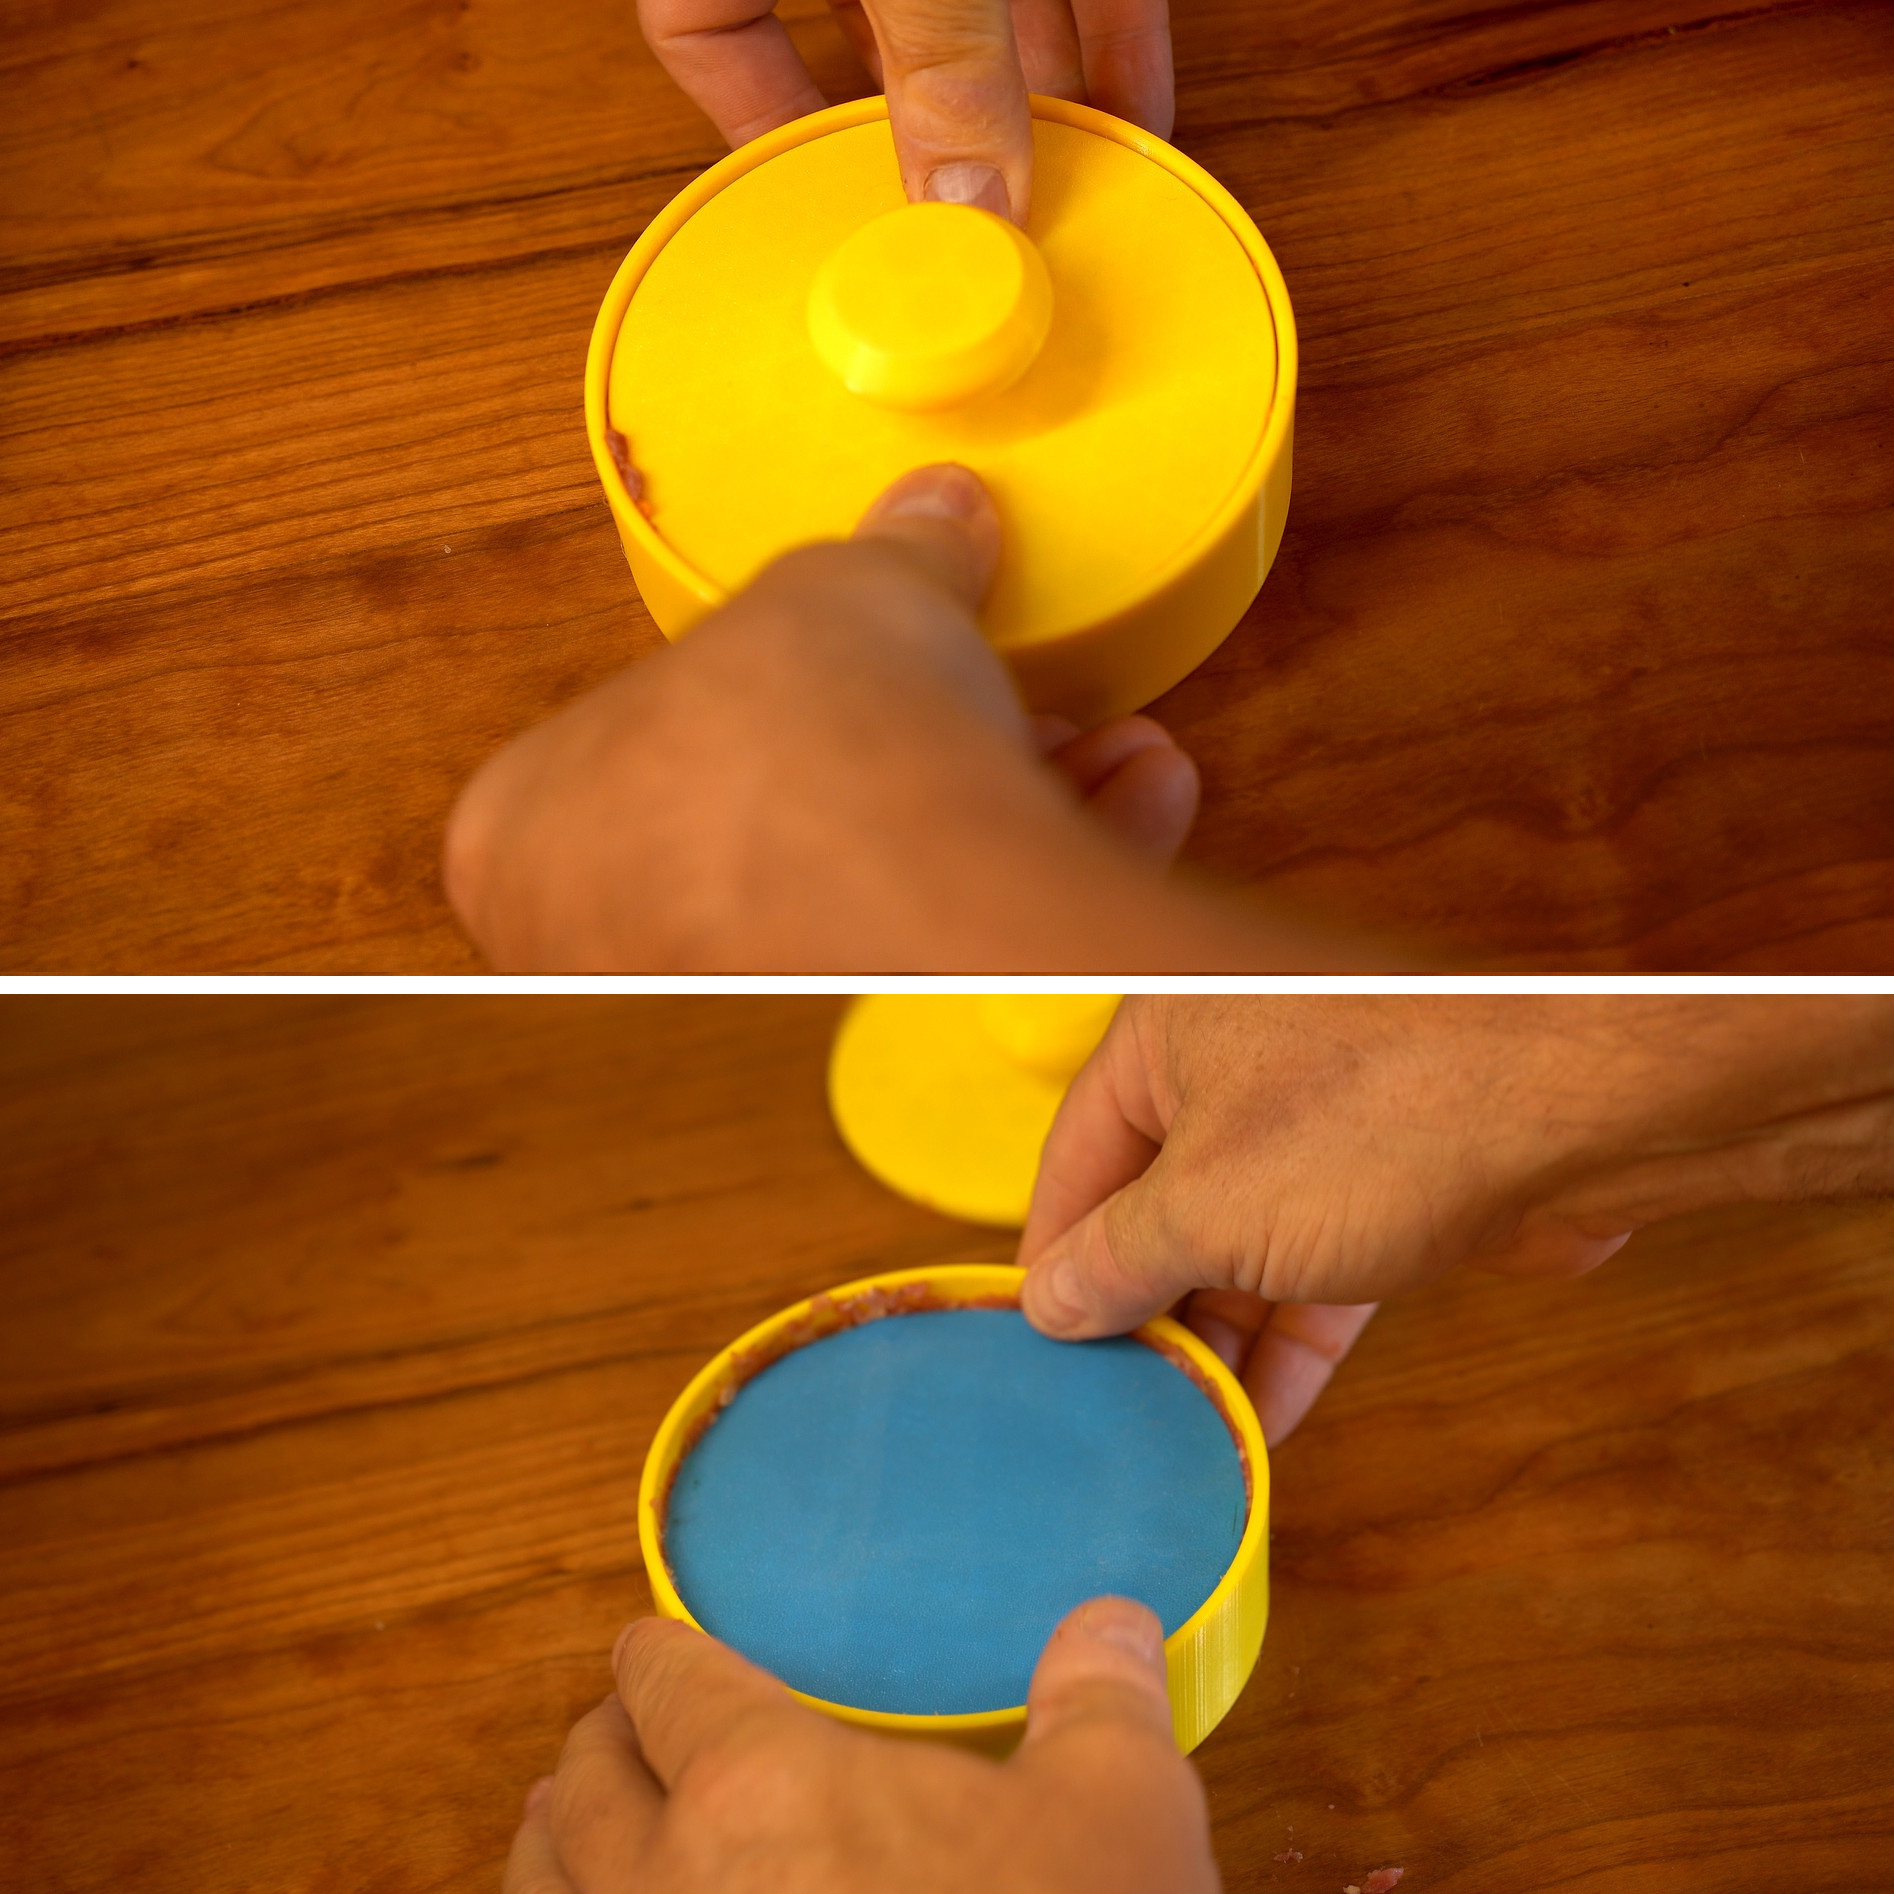
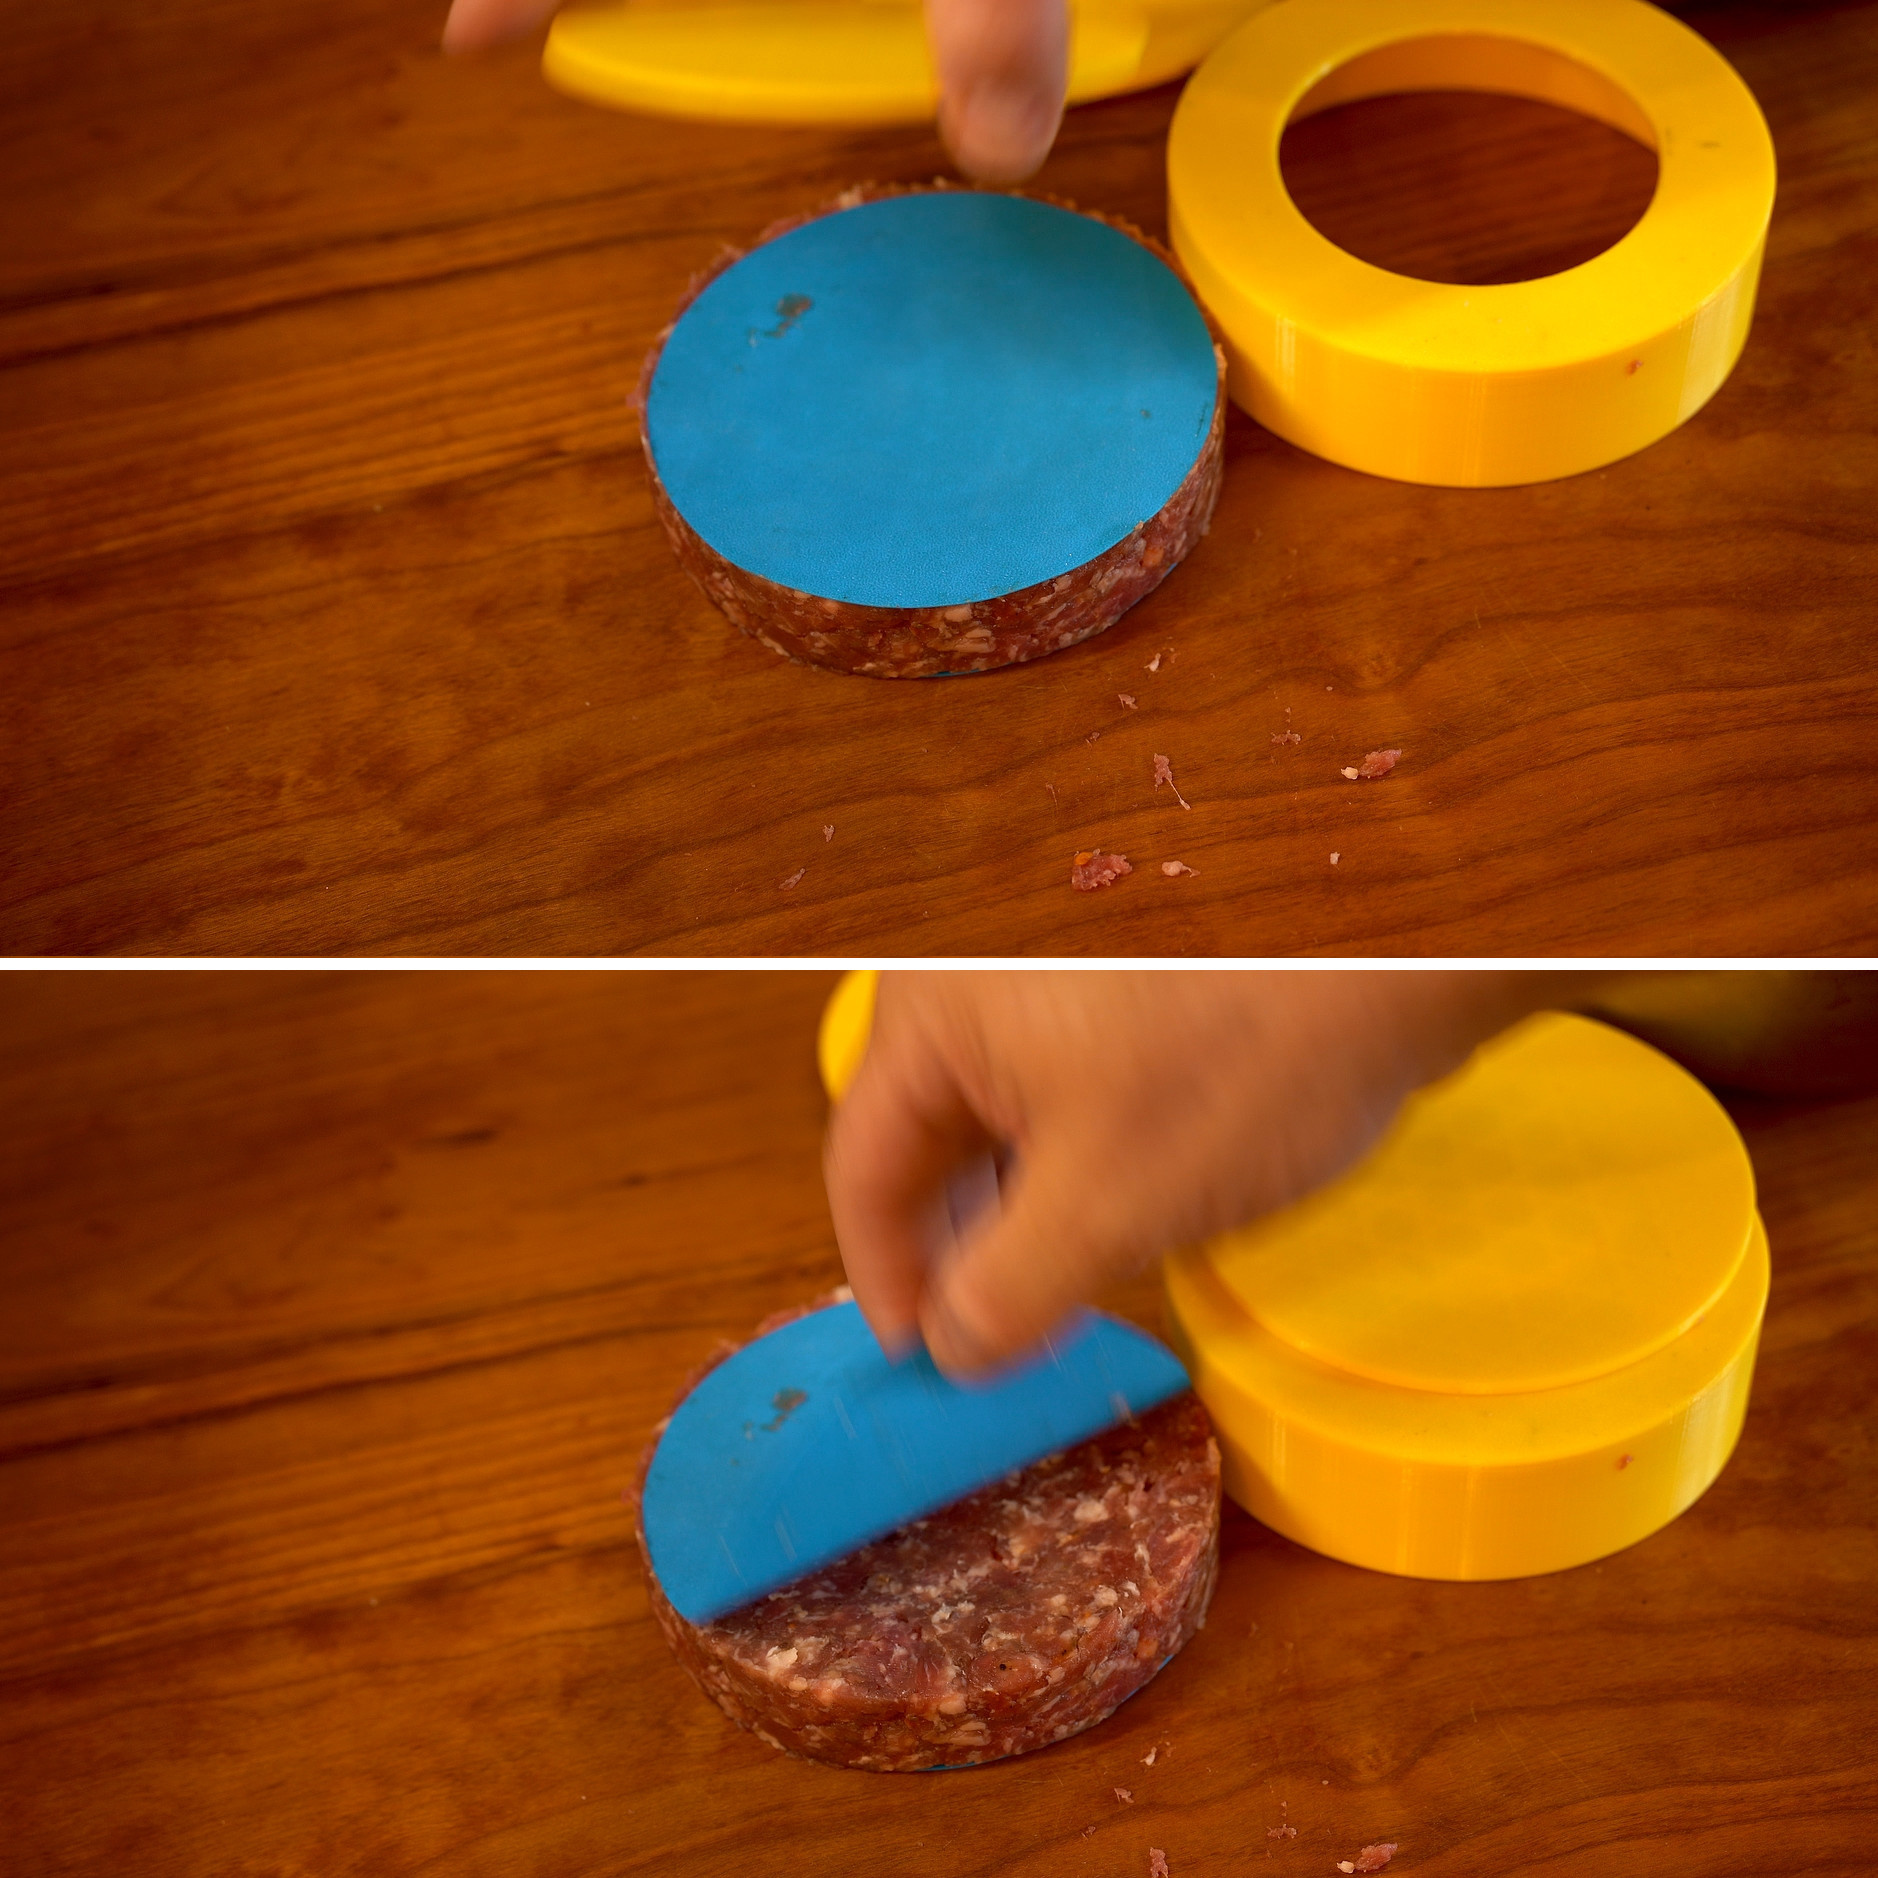
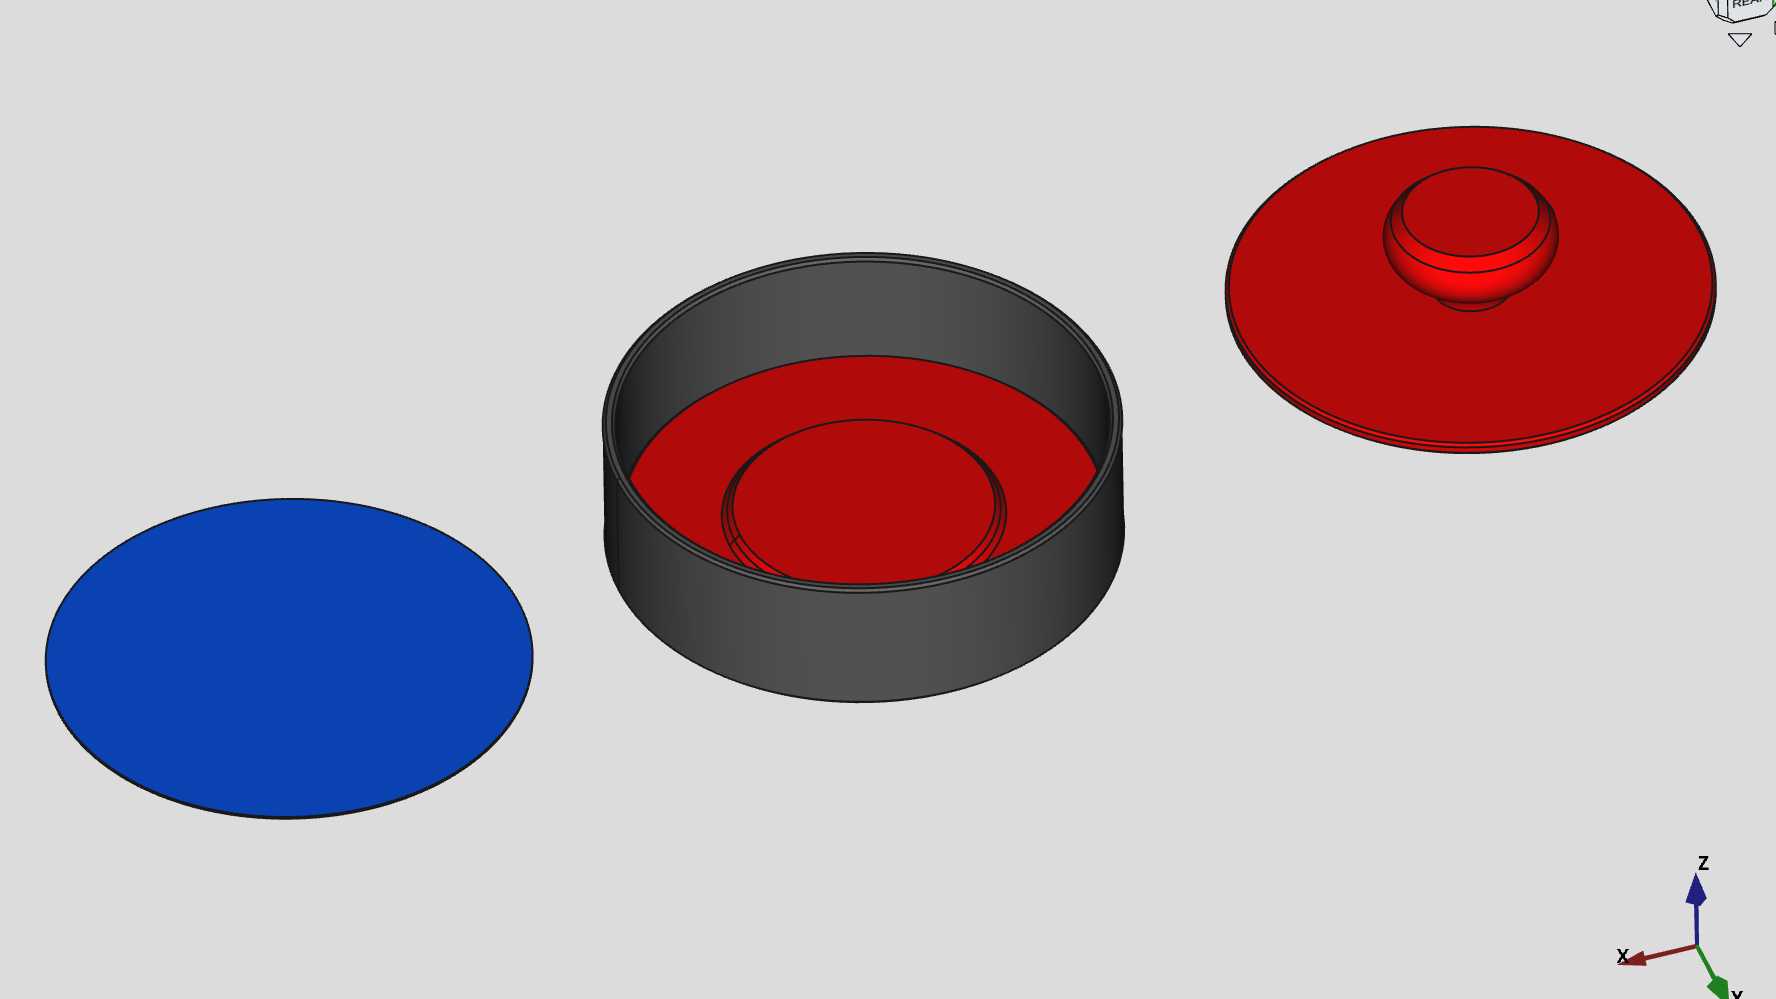
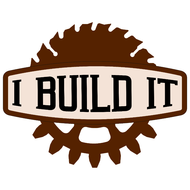
Here's an easy one: a 3D printed burger press with a twist - printing peeling sheets from TPU to make the patty release from the press easier.
I used TPU, but a stiffer plastic would also work.
I'll have a cooking video - possibly - this weekend showing how it works. In any case, try it out. And the great thing about 3D printing is you can scale the parts to make bigger or smaller patties.
Sorry, no wooden version. Although it certainly would be possible, some things (like raw meat) are better handled by plastic.
Here are the print files, free for everyone:
https://www.dropbox.com/scl/fi/byqhllxs0et0d2qkkv3e6/Burger-Press.zip?rlkey=pewl61xa3aj6xa1v9oz29eua1&st=lawg0bz7&dl=0